Resources
- Stable Diffusion – Automatic 1111
- ControlNet
- Realistic Vision V2.0
- Ambrosinus Toolkit
- Ladybug
- Grasshopper Template File
Checklist
- Install Stable Diffusion Automatic1111
- Install ControlNet models
- Install Realistic Vision V2.0
- Install Ambrosinus Toolkit
- Install Ladybug
- Edit webui-user.bat file (—api)
- Setup the Component Settings + Run Stable Diffusion
- Connect to Rhino Viewport
Final webui-user.bat File Format
@echo off
set PYTHON=
set GIT=
set VENV_DIR=
set COMMANDLINE_ARGS= --api
git pull
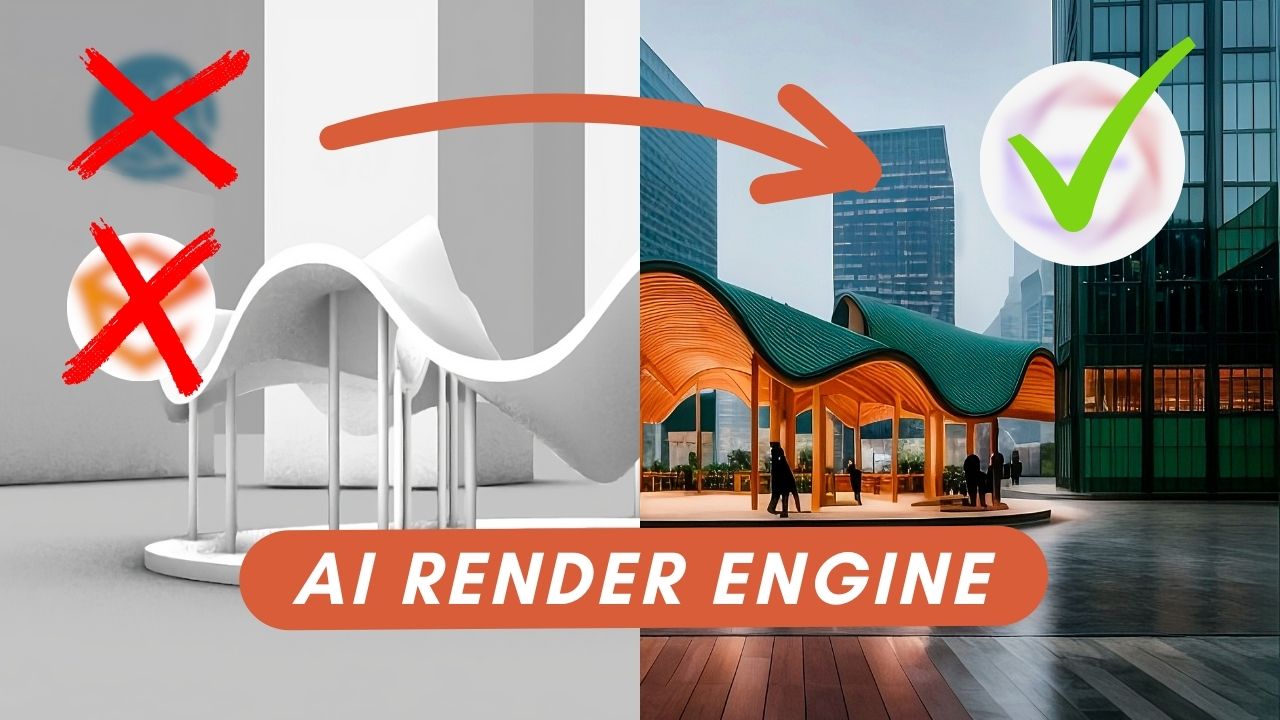
call webui.batHello there, today I want to talk about how to use AI as a Render Engine directly in Rhino.
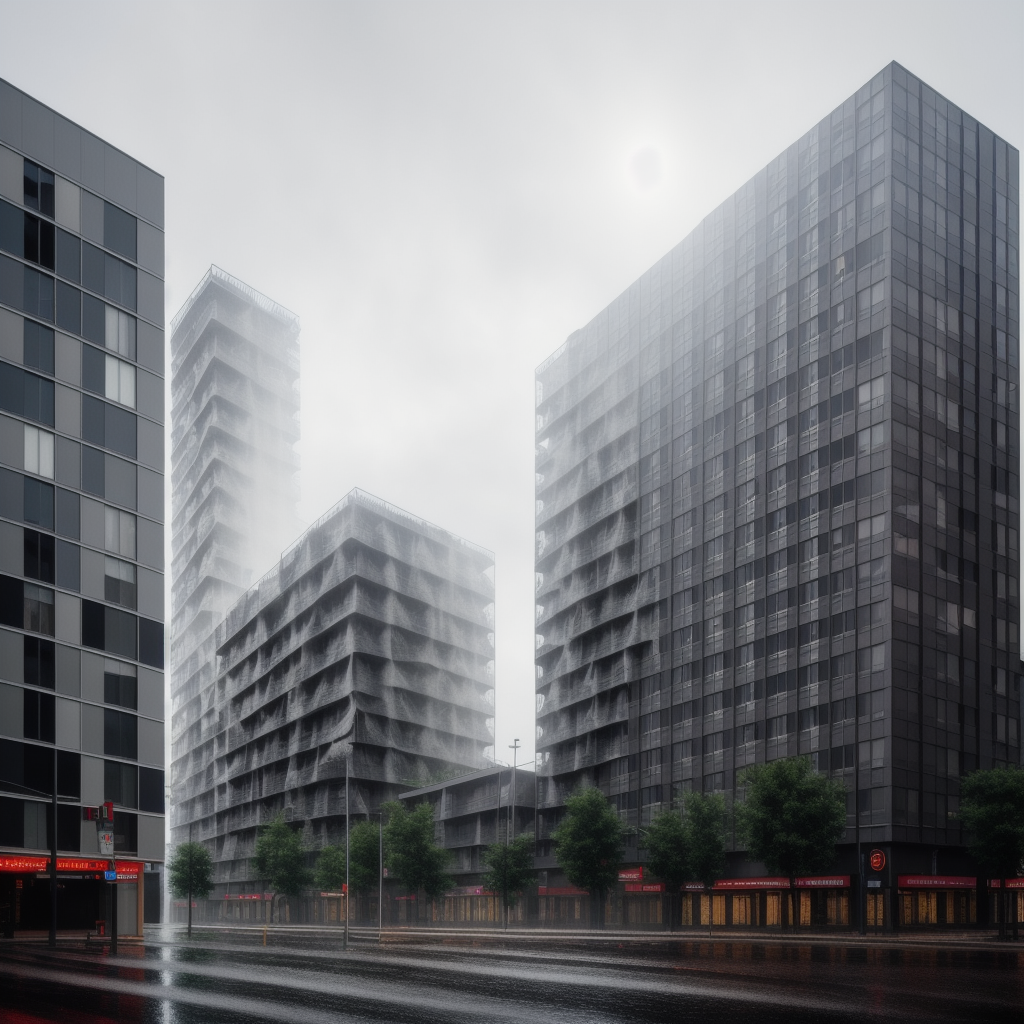
Once your 3D model is ready, you can just save your view, describe it and render images like this within seconds. Find the timeline of the video in the down below. Feel free to skip ahead if you want to. Let’s start!
First, Set Up
For this video, I will assume you have Stable Diffusion and ControlNet models installed locally. If not you can find a tutorial in the video description.
Go ahead and run Rhino as administrator. Make sure you run as administrator just to be sure everything will work smoothly. After that, we need download a plug-in to be able to use Stable Diffusion in Rhino. You can install it directly from Package Manager. Or you can also find it from the Food4Rhino website and then place it in the components folder of Grasshopper.
This is the developer’s website of the plug-in, so thanks for sharing this!
And lastly, we need the Ladybug component, you can find all the resources in the video description. Once you install everything, you will find these extra notes in your Grasshopper. We need two main components from here, LaunchSD_local and this first one, to be able to control stable Diffusion inside Grasshopper.
Before we continue, we should modify the webui-user.bat file so we can access it inside Rhino. Go to your SD files, find webui-user, right click and click on edit. And we should write “—api” to this row. Then just save and close it.
Now we need to address this file inside Grasshopper, we can do this with a file path component. Right-click, and click on “Select a directory”. Then just choose the file where you installed Stable Diffusion and the component will find the necessary files inside automatically. Create a button component so we can run the component. If you attach a panel to output, as you can see here it says the port is not available because stable Diffusion is not running right now. Click on start and it will automatically run the automatic1111. Once you have this URL, it is ready. You can copy this and open it in your web browser but now we will control it directly from Grasshopper.
If you click on the check process, it is available now. So I have this file ready to use with all the components and settings you need. I will upload this file so you can find it in the descriptions. In this part you have access to all the classical SD settings; you can choose text-to-image or image-to-image with ControlNet models. You can write your positive and negative prompts on these panels.
To start we need to select a file where we want to save the generated images. Right-click and choose select a directory. You can choose any file you wish. So let’s test it first with text-to-image. I will write a basic description as my input here for a building in the city. Make sure the Text-to-image mode is selected, you can adjust the number of sampling steps and CFG scale here. Adjust the image size you want to generate. I will choose 512 to 512 for the first generation. Let’s create four images. If you want to use a specific seed number you can connect this slider here; otherwise, it will use a random seed number. And let’s hit generate.
After a couple of minutes here is our first image. You can directly see the results inside Grasshopper here, and you can change them from the scale here.
This node is the only reason we need the Ladybug plug-in, so even if you don’t have it you can still generate images but you won’t be able to visualize them in here. You can go to the file you choose and find the generated images there.
Okay, this is where things get more exciting.
For image-to-image, we need this additional part so we can find out the inputted image size and keep the same ratio in the final image. So replace the image size input with this one here. Go ahead a choose an image you want to edit with image-to-image mode. I will choose one of the images we just created and try to edit its colors just to test it. Once you pick it, it will appear here so you can easily see your image input.
When you change it to image-to-image mode, you will get this error because the base image is not connected.
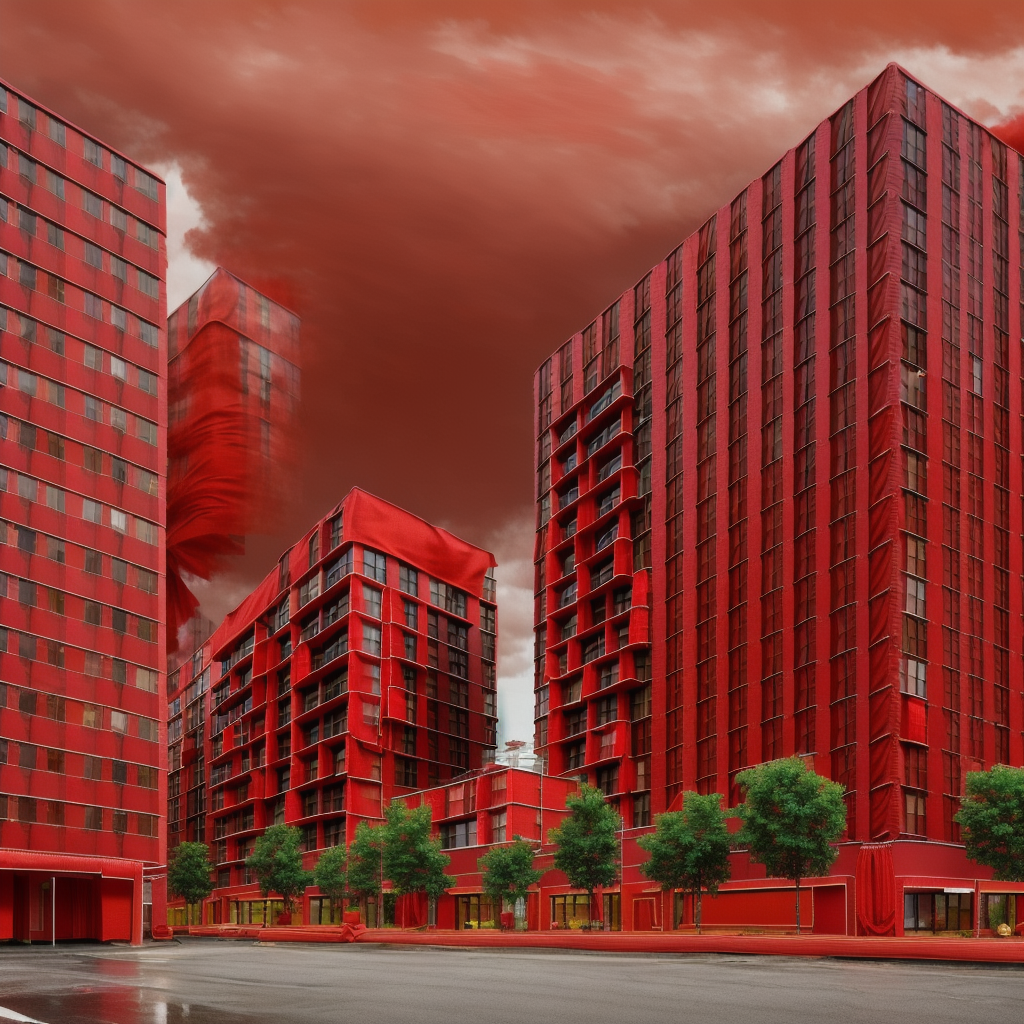
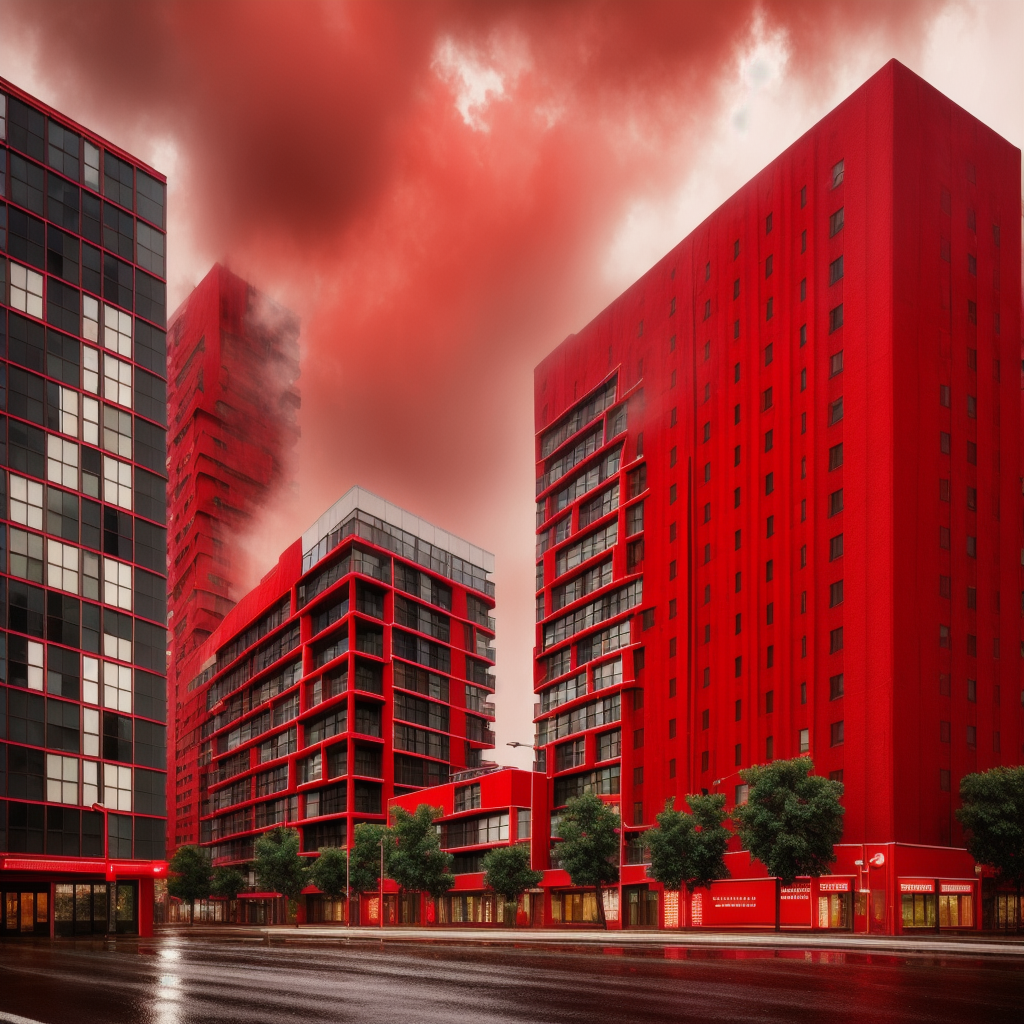
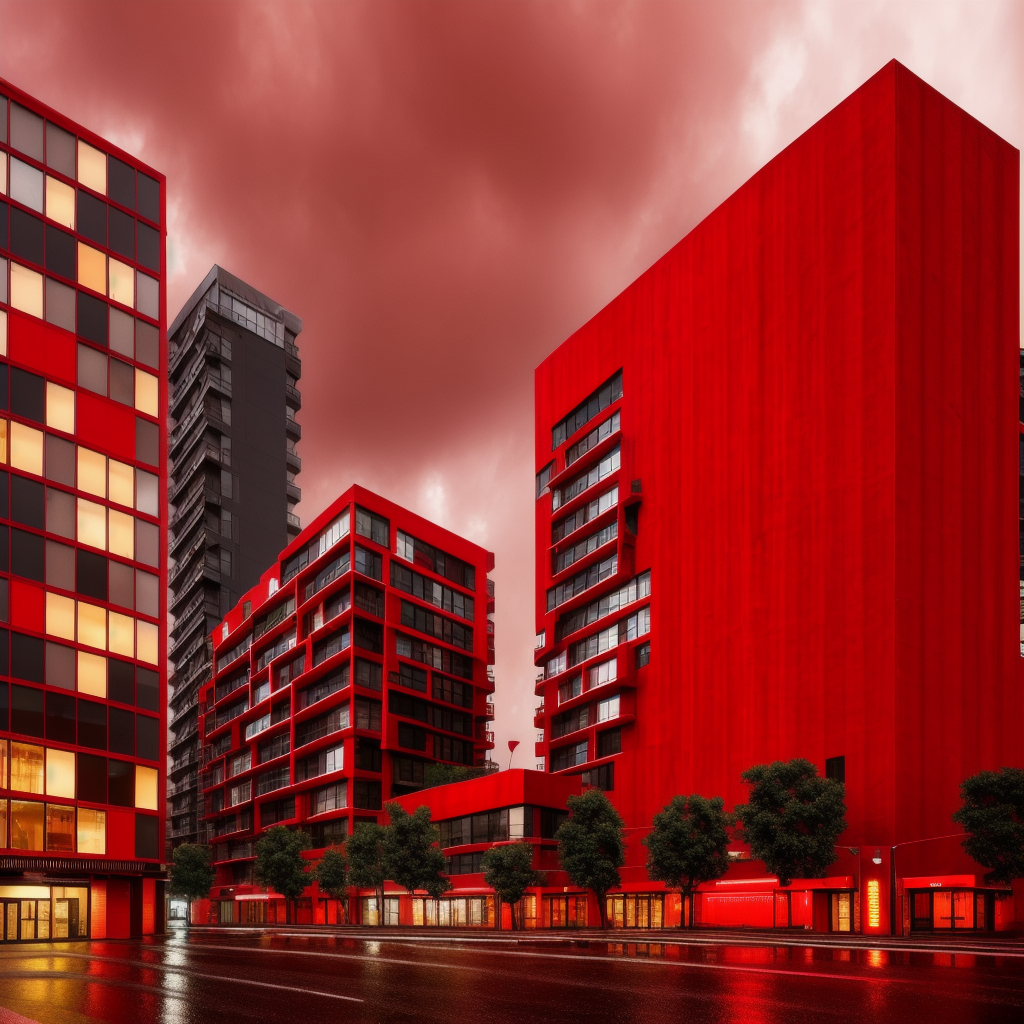
You can adjust the image size here, but it will keep the image ratio the same as the input image. And lastly, adjust your text and generate. And here are some of the results.

Now we come to my favorite part, how we can use this as a render engine.
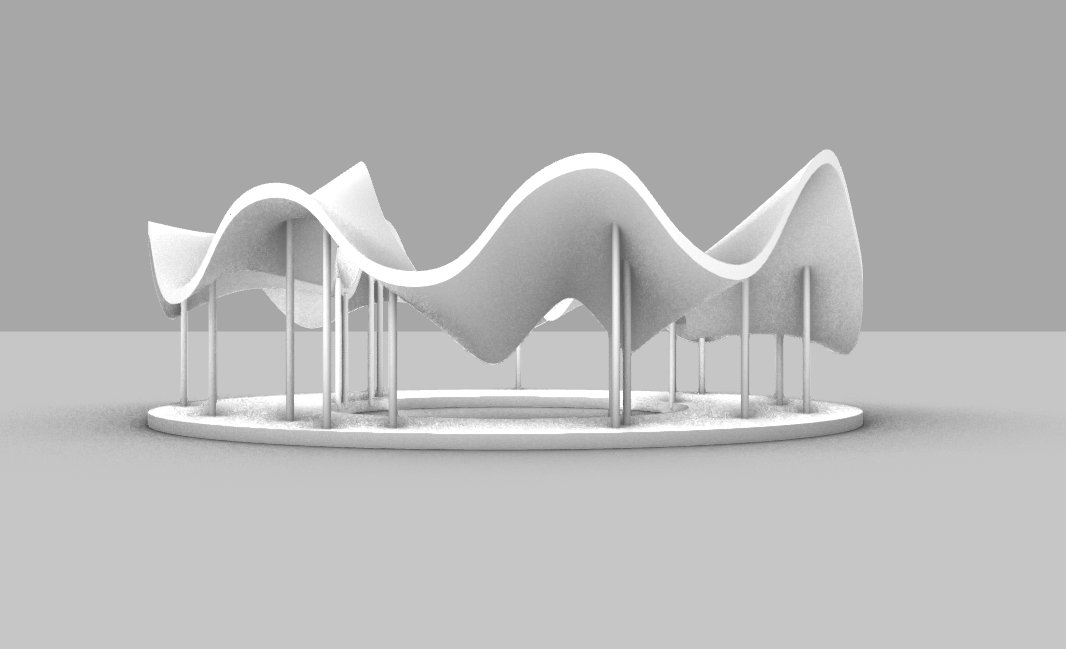
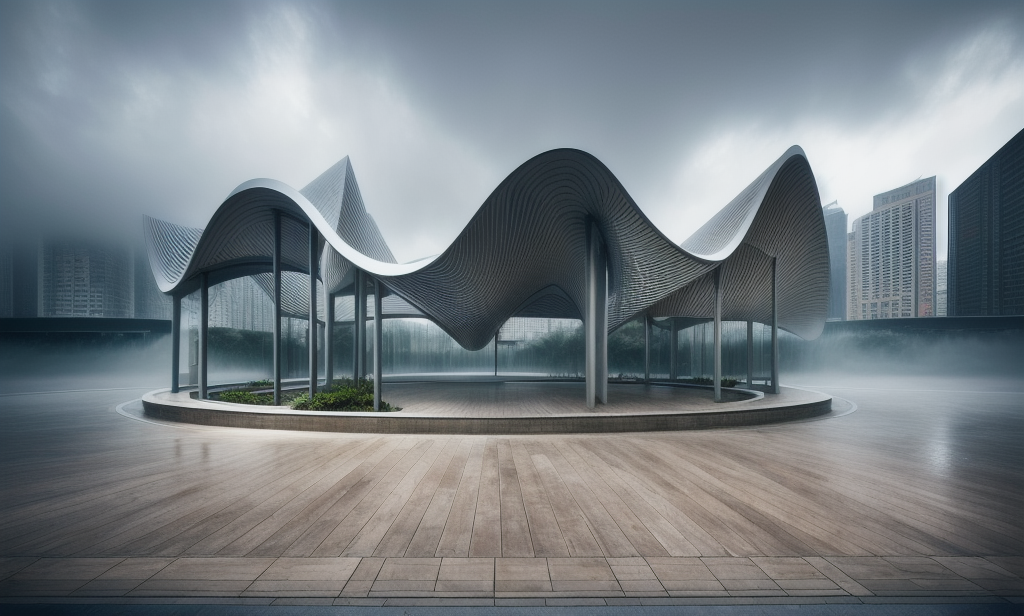
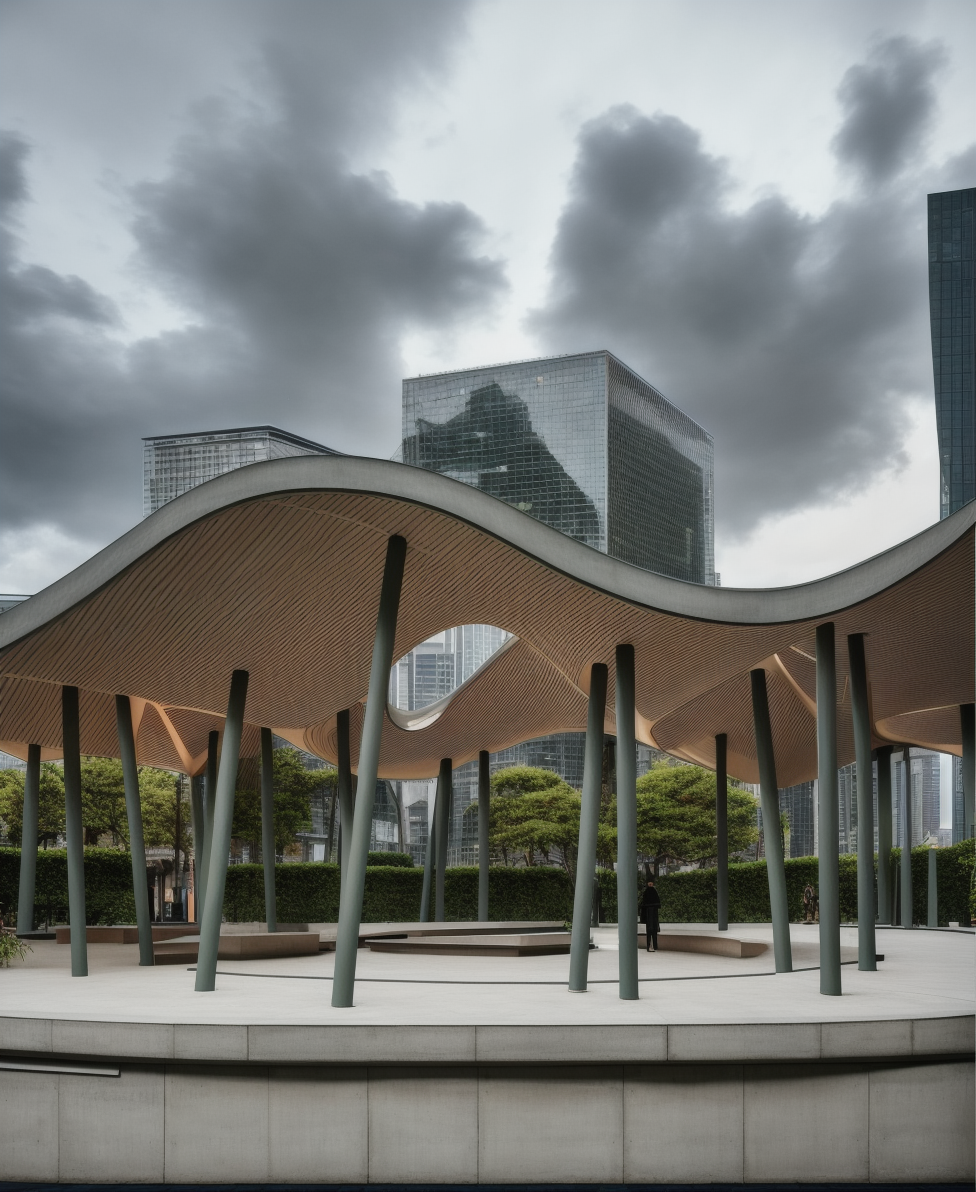
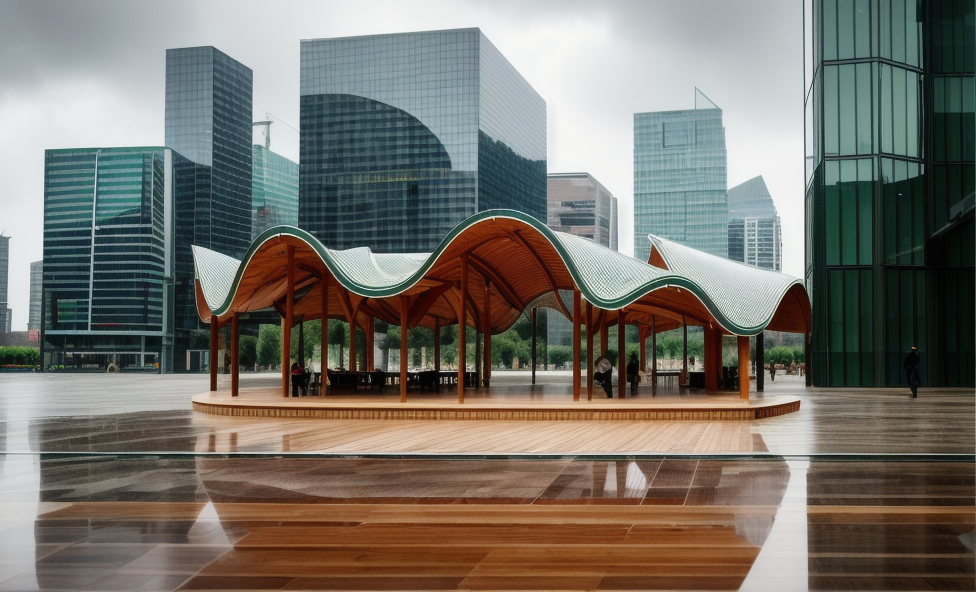
To test this out, I will model a simple pavilion model in Grasshopper. But of course, you can use any of your 3D models. First, I will create a new file to save our base images. We have this additional script so we can directly use a rhino viewport to render it. Go ahead and select the file we created here.
Once you find a nice view for your model, save the view. I will call it view1 and we should write the exact name of the view here so we can access it here.
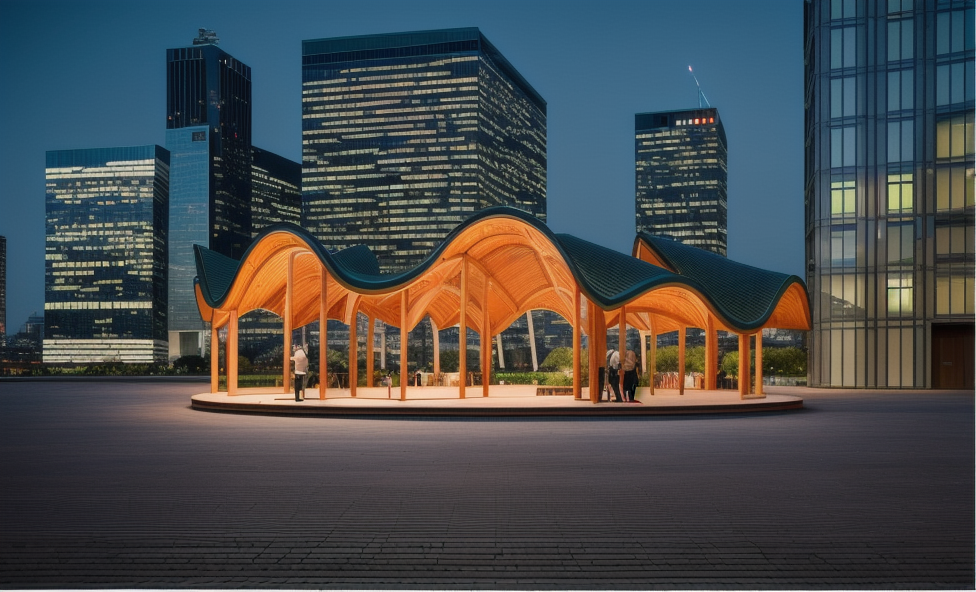
When you turn this toggle to true, it will save the viewport as a jpg so we can use it as a base image. So let’s use this as a base image. As you can see here is our saved view from Rhino. Again you can adjust all the settings here. I will choose the ControlNet depth model. It really works great with 3D models but feel free to experiment with all of them.
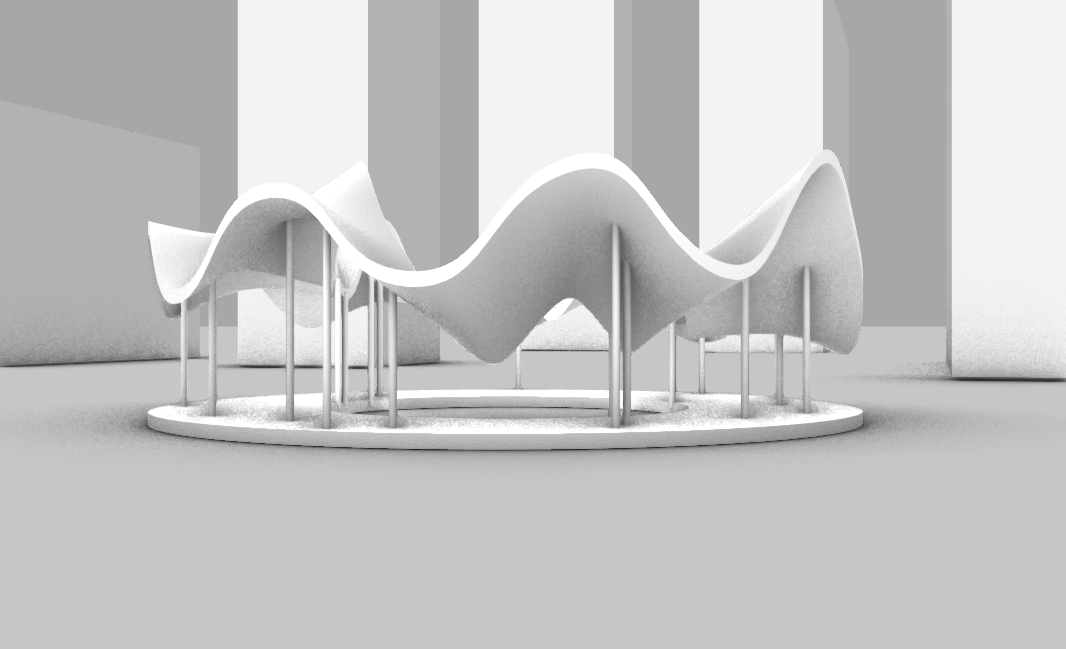
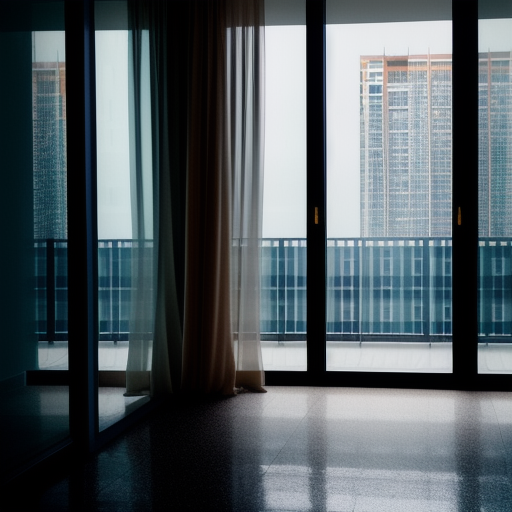
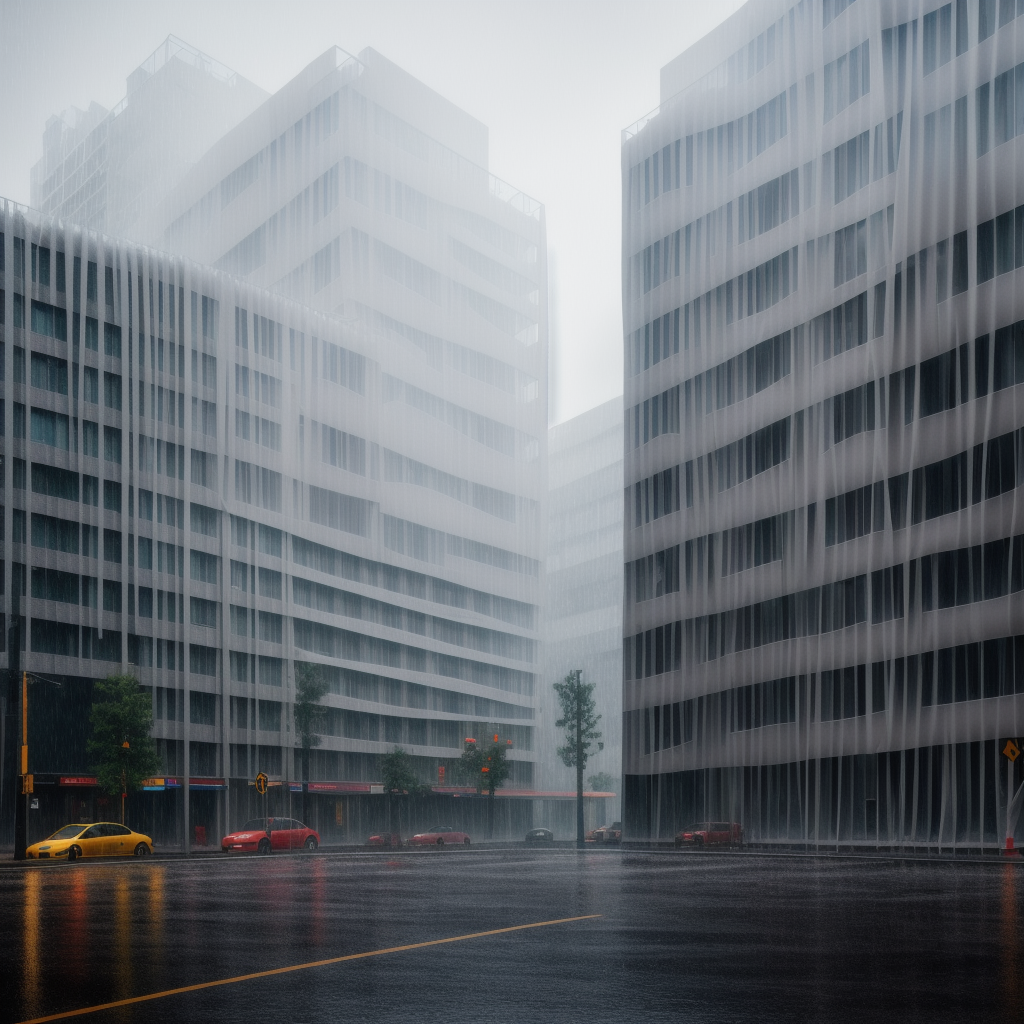
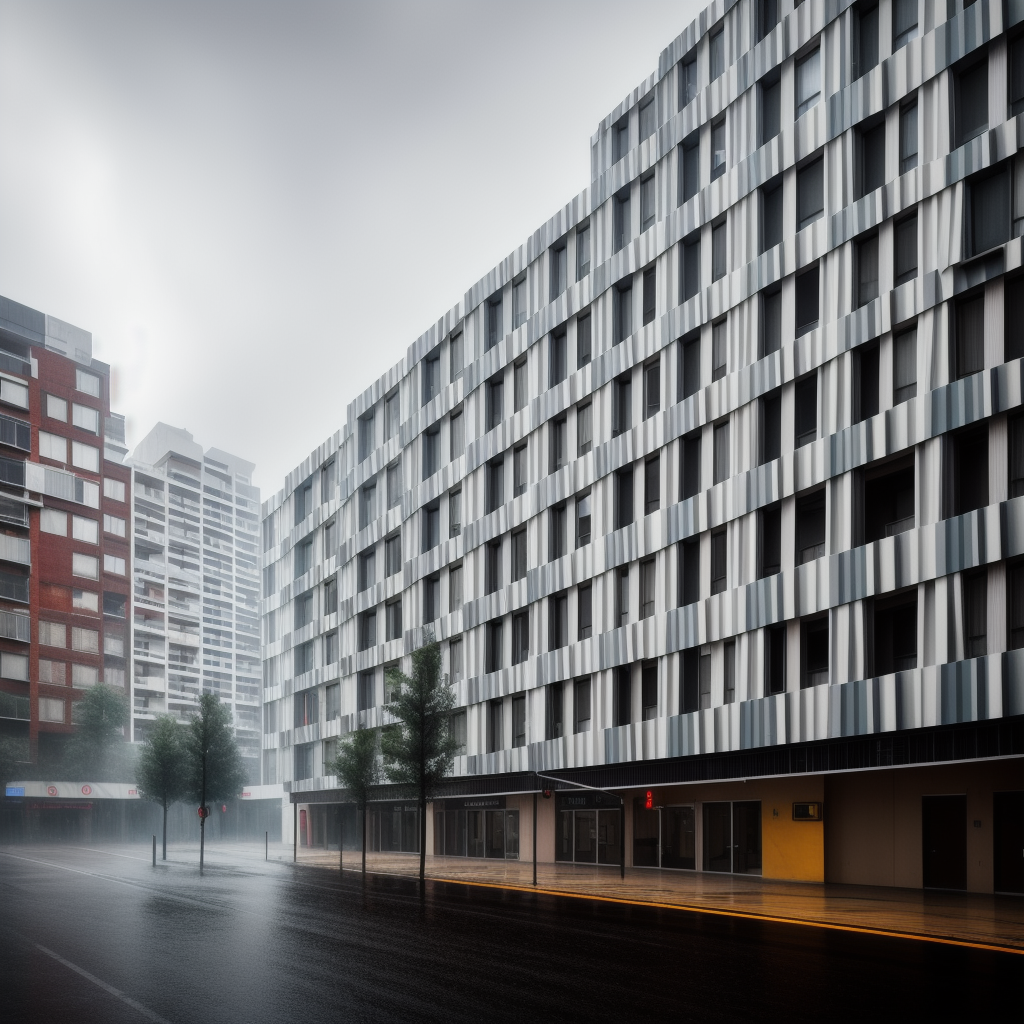
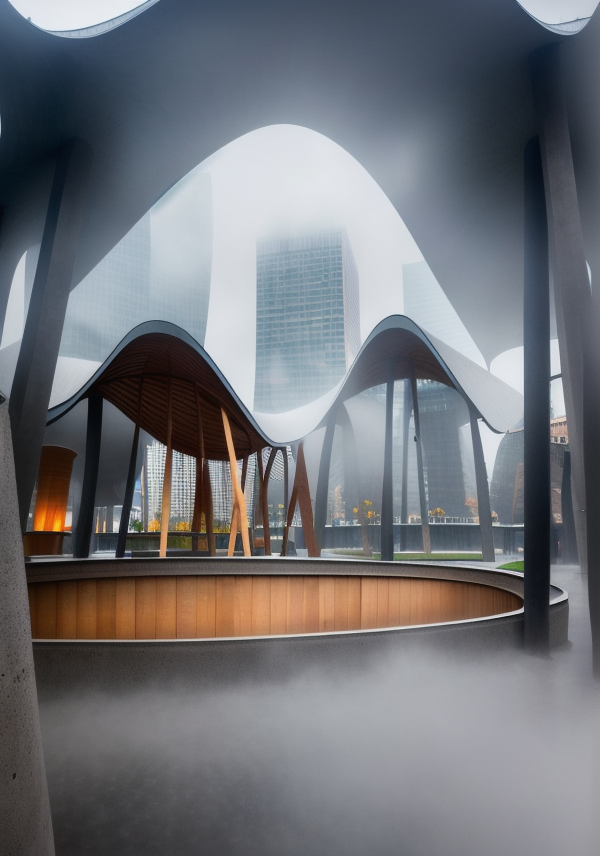
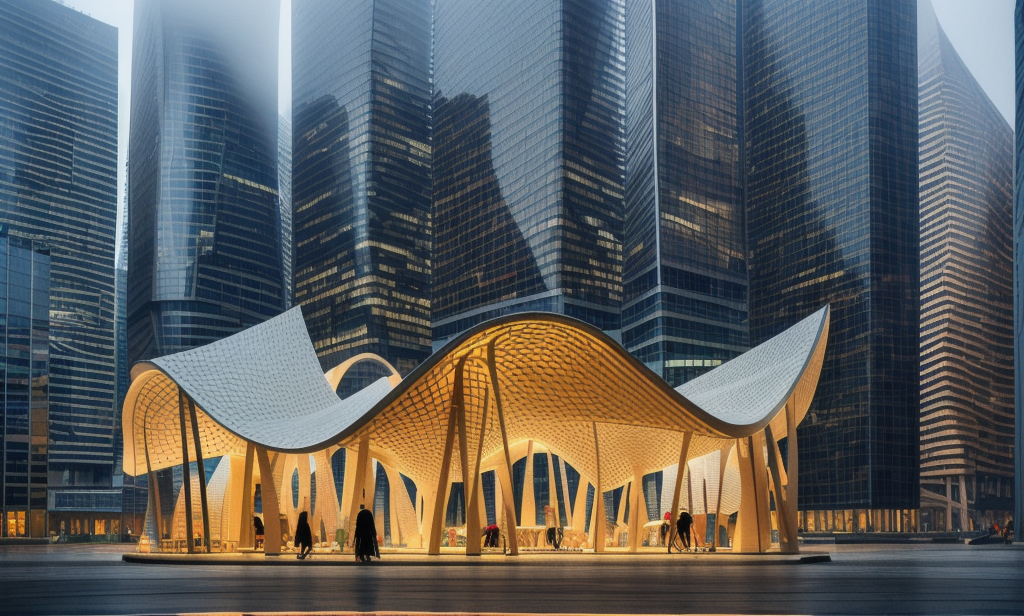
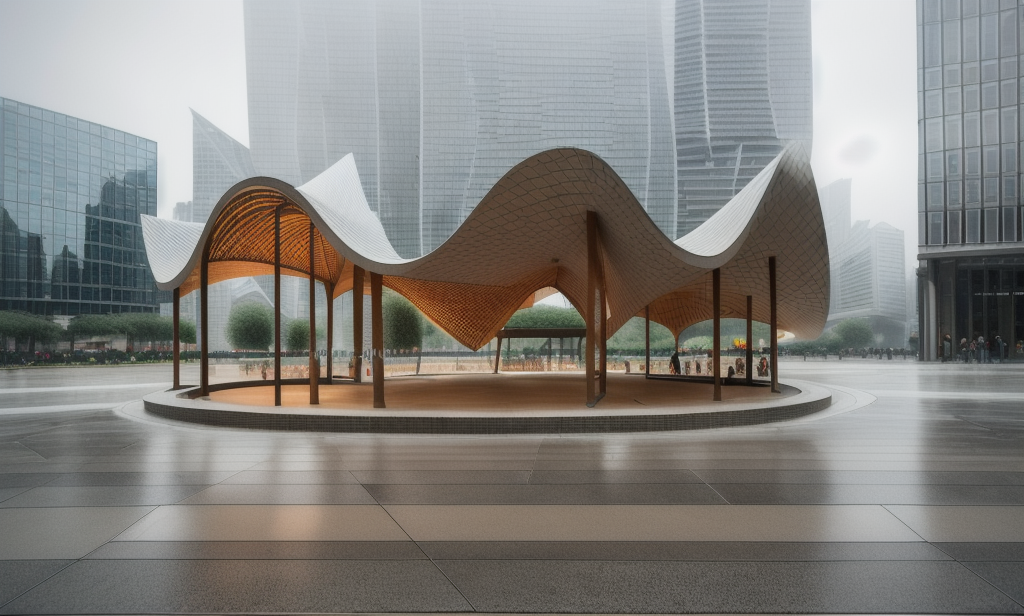
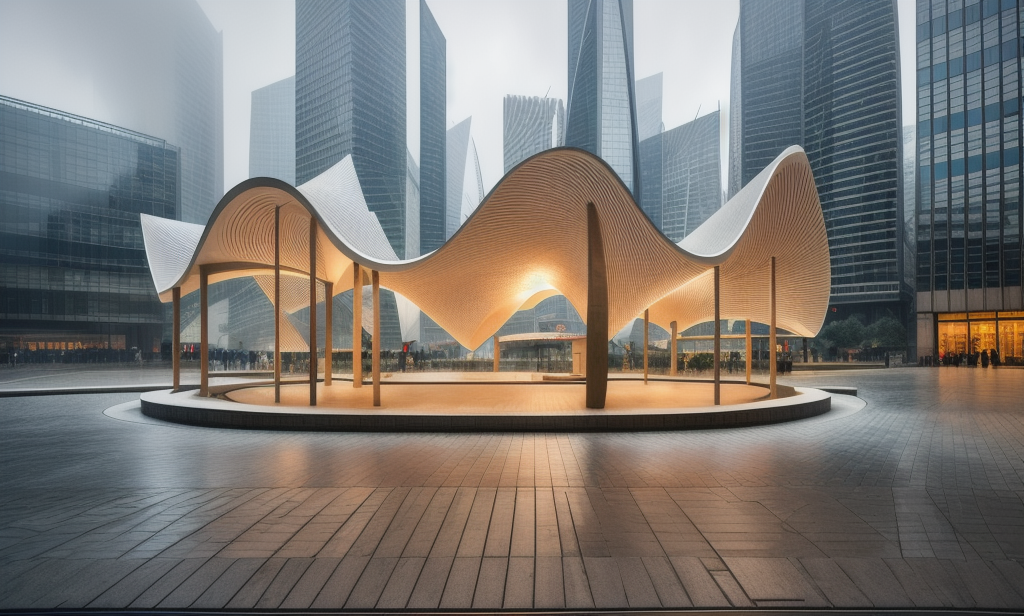
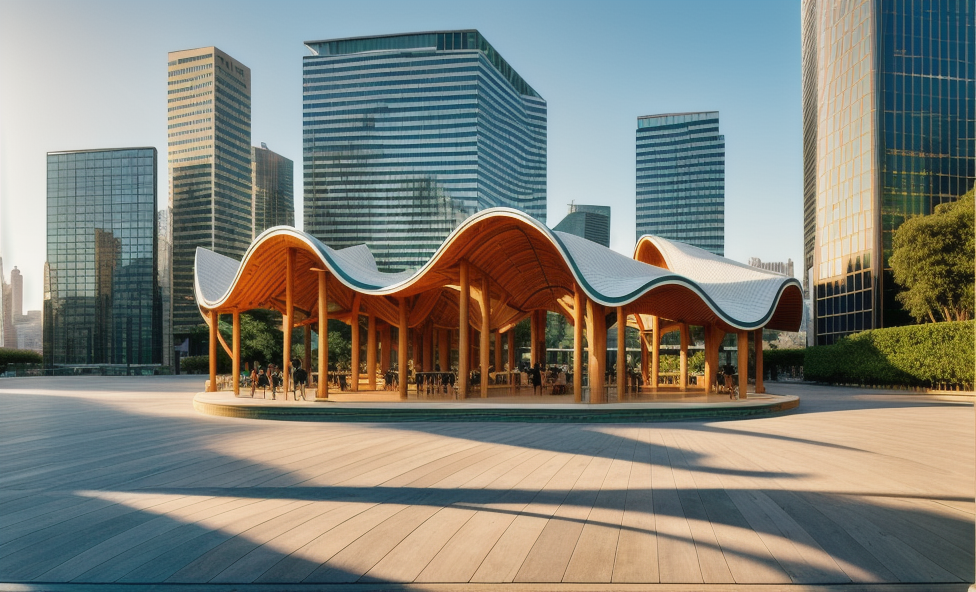
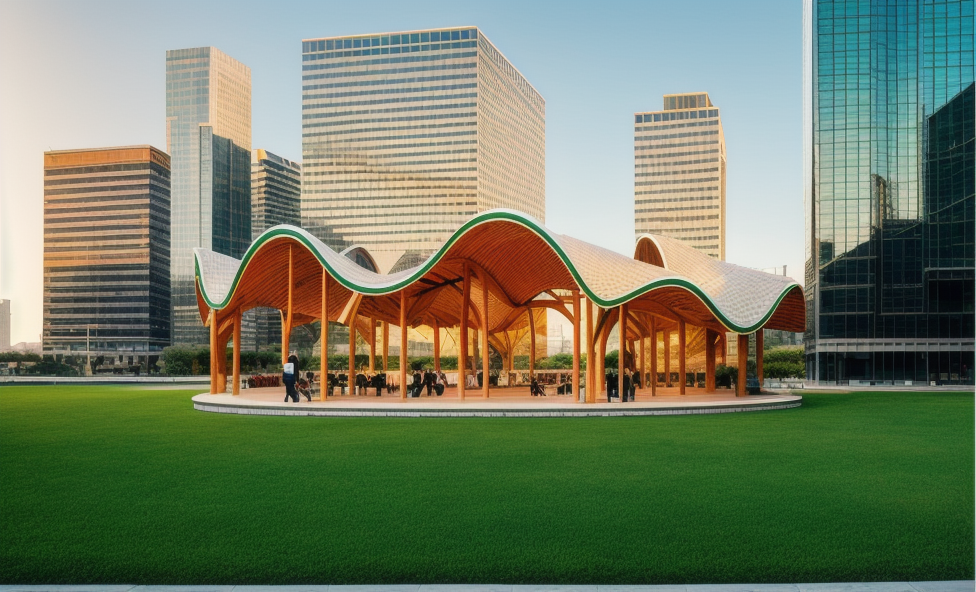
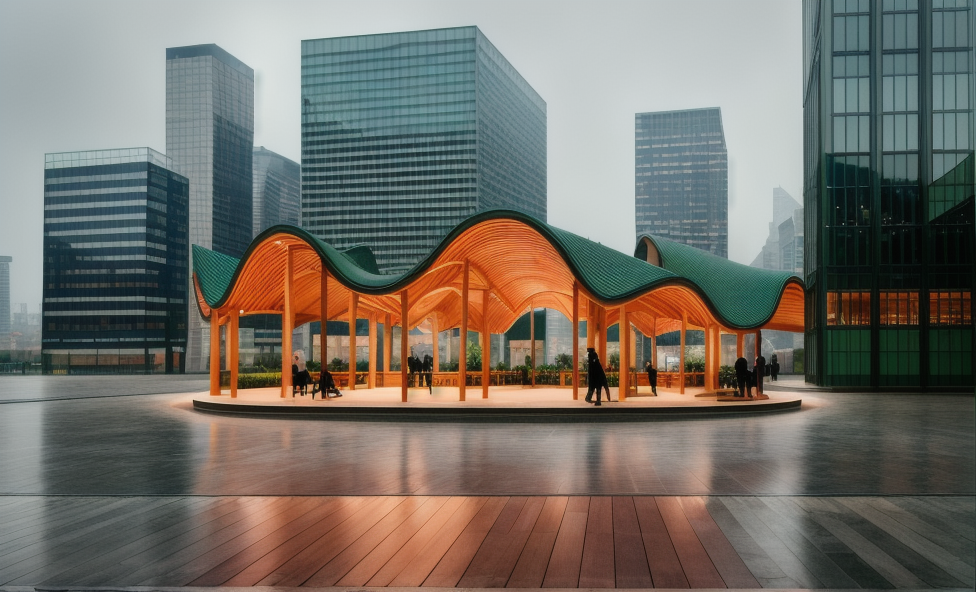
Then I described my render and generated. Here is our first render. It looks absolutely amazing on the first try and it is created just in seconds.
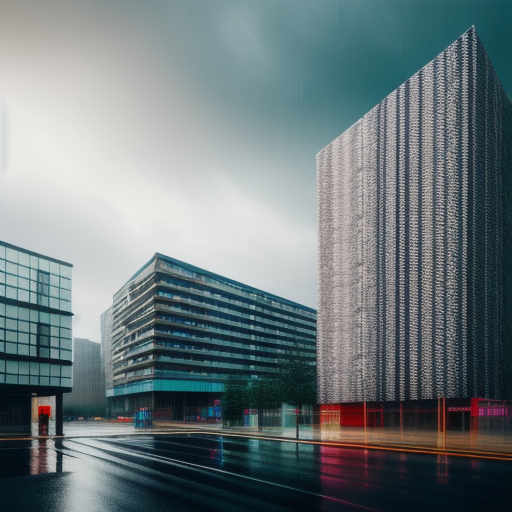
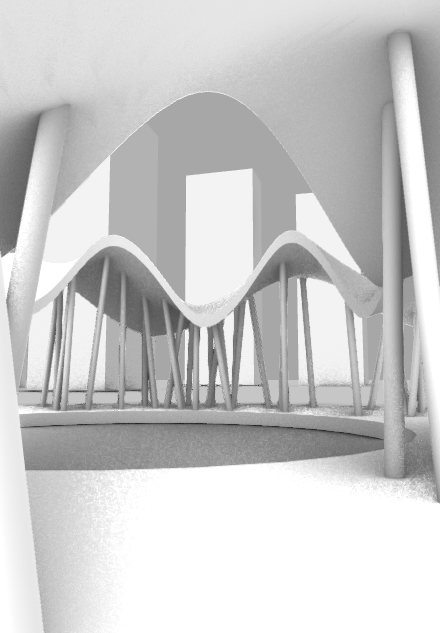
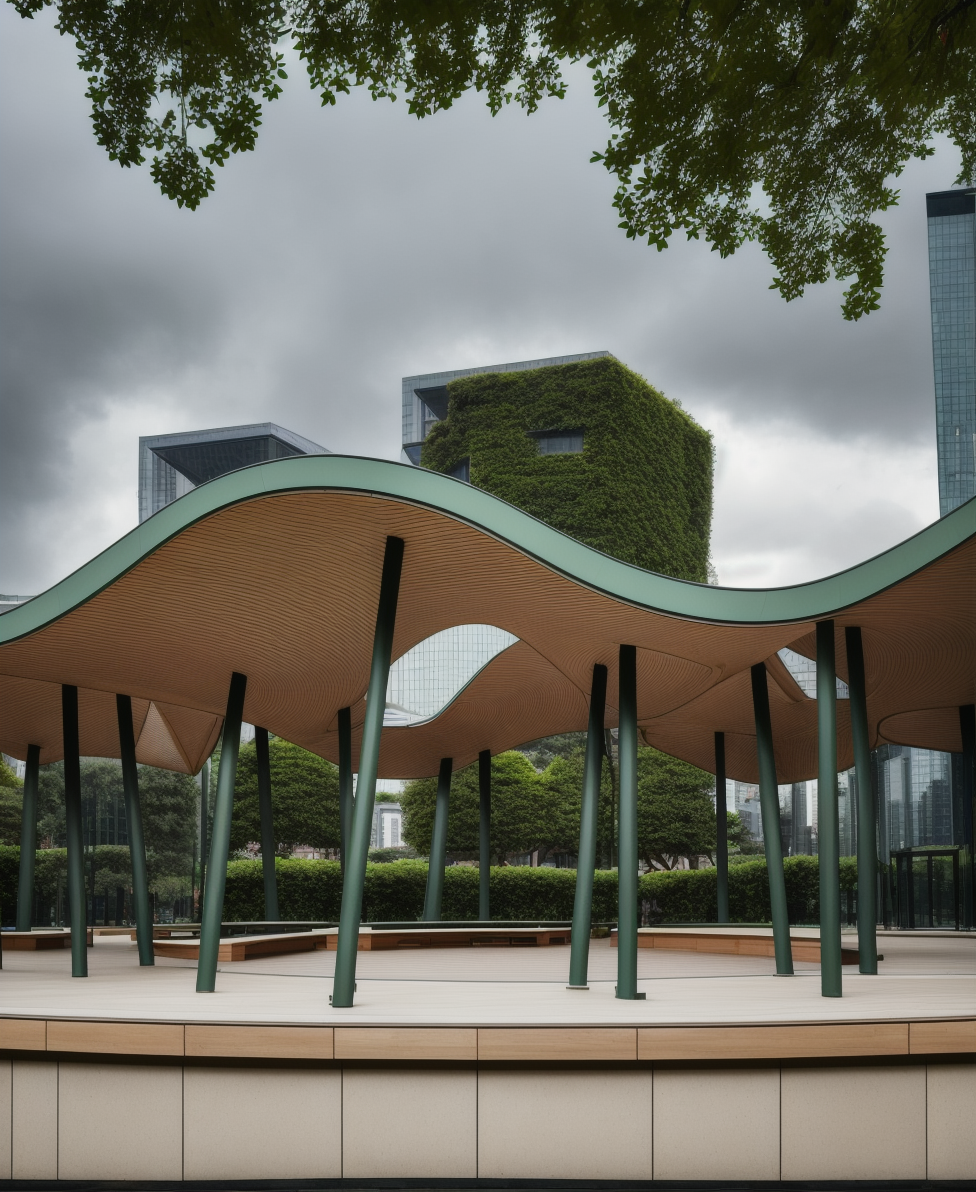
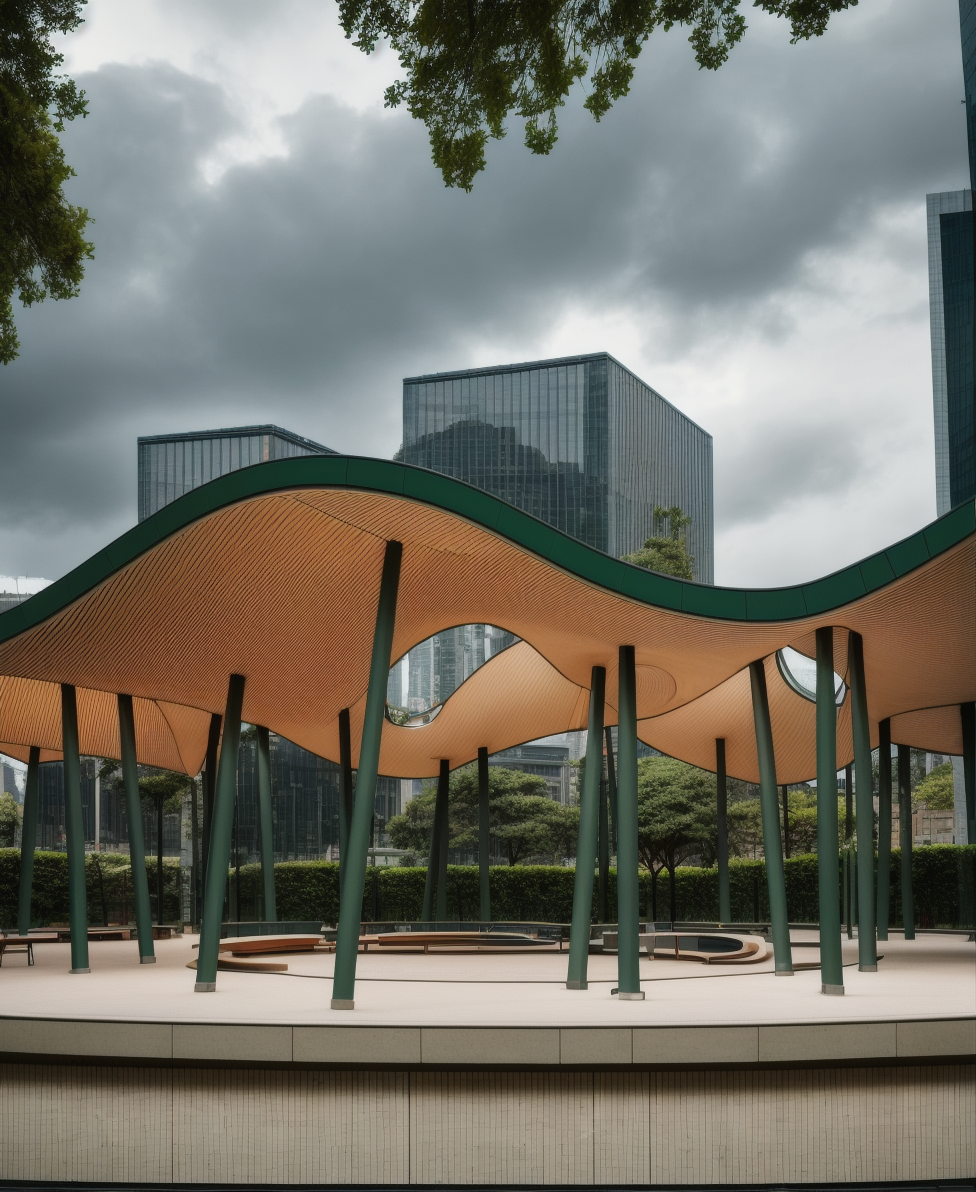
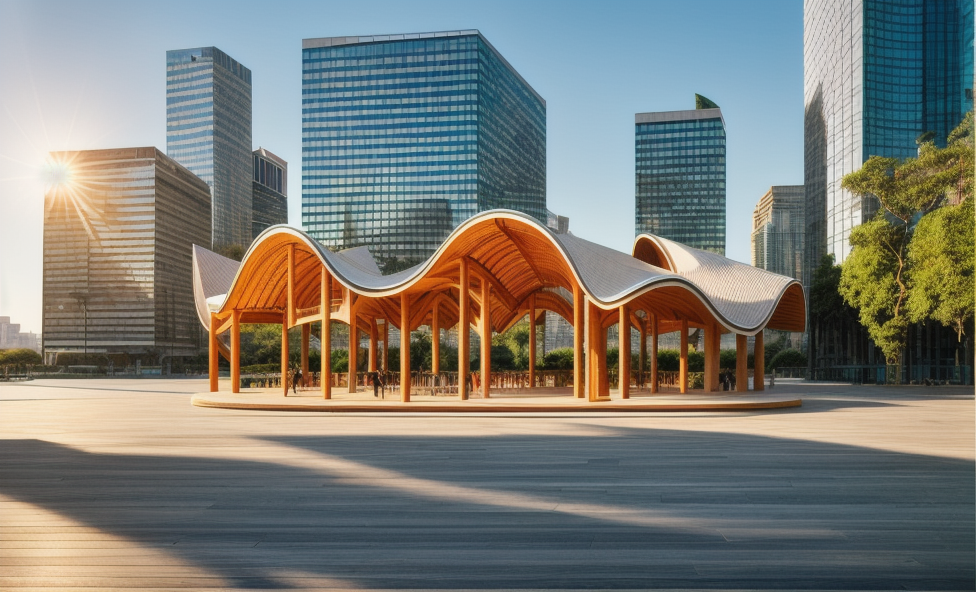
I wanted to have a city view at the back so I just added some blocks to the model. When you want to update your viewport, you can just move this slider one step and it will automatically update the view. You can attach a panel to check the file name to make sure it is the correct view.
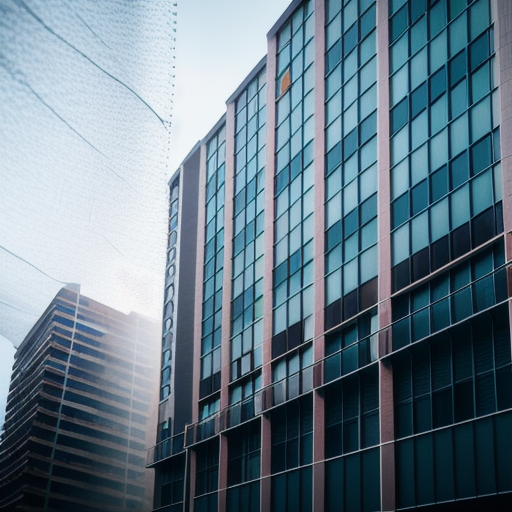
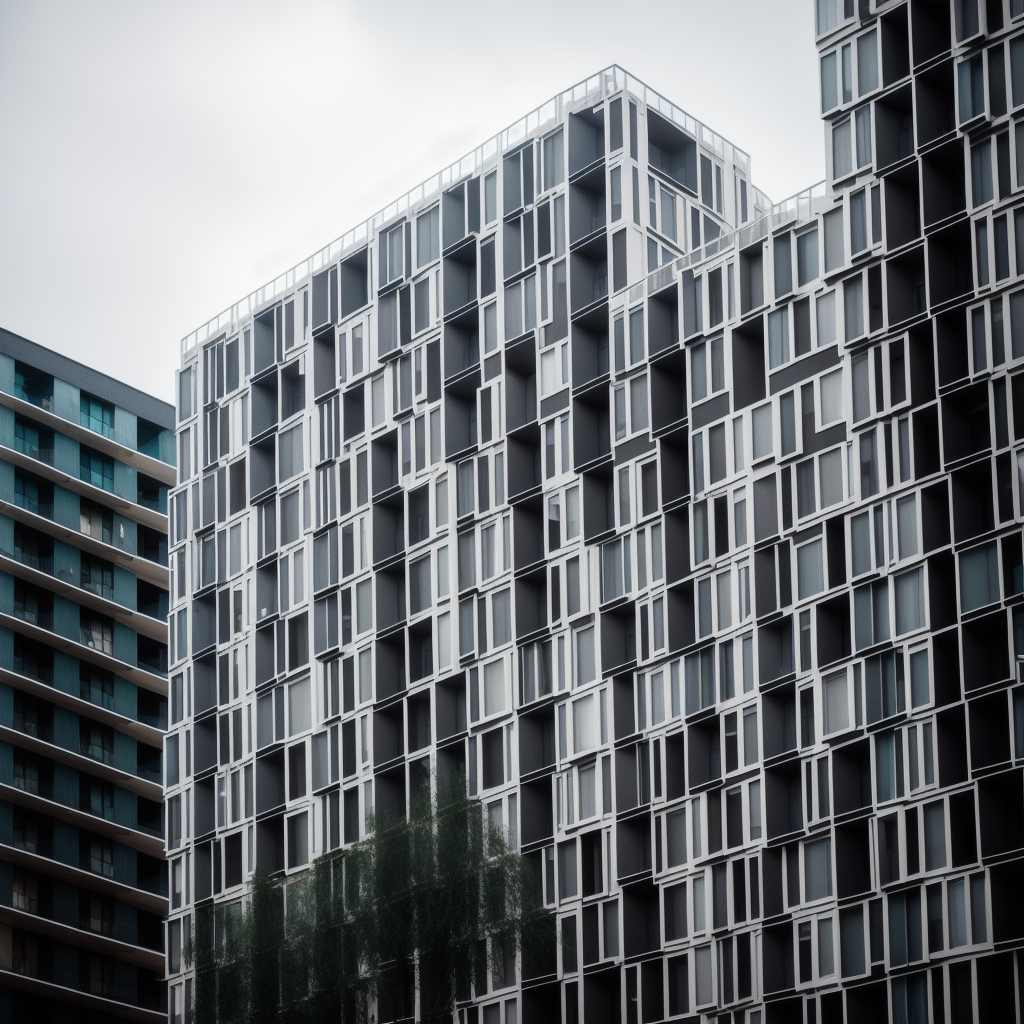
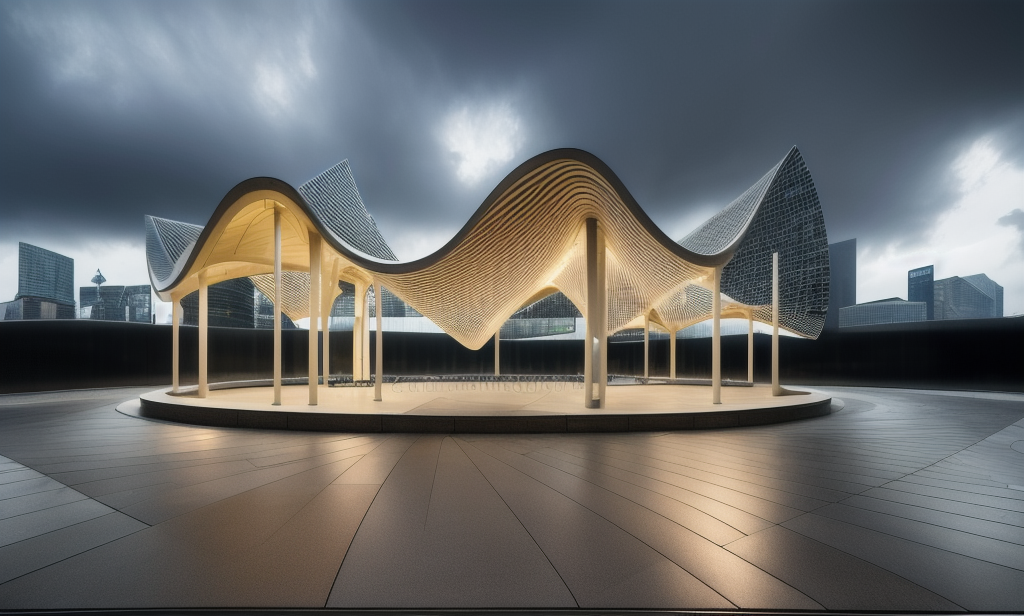
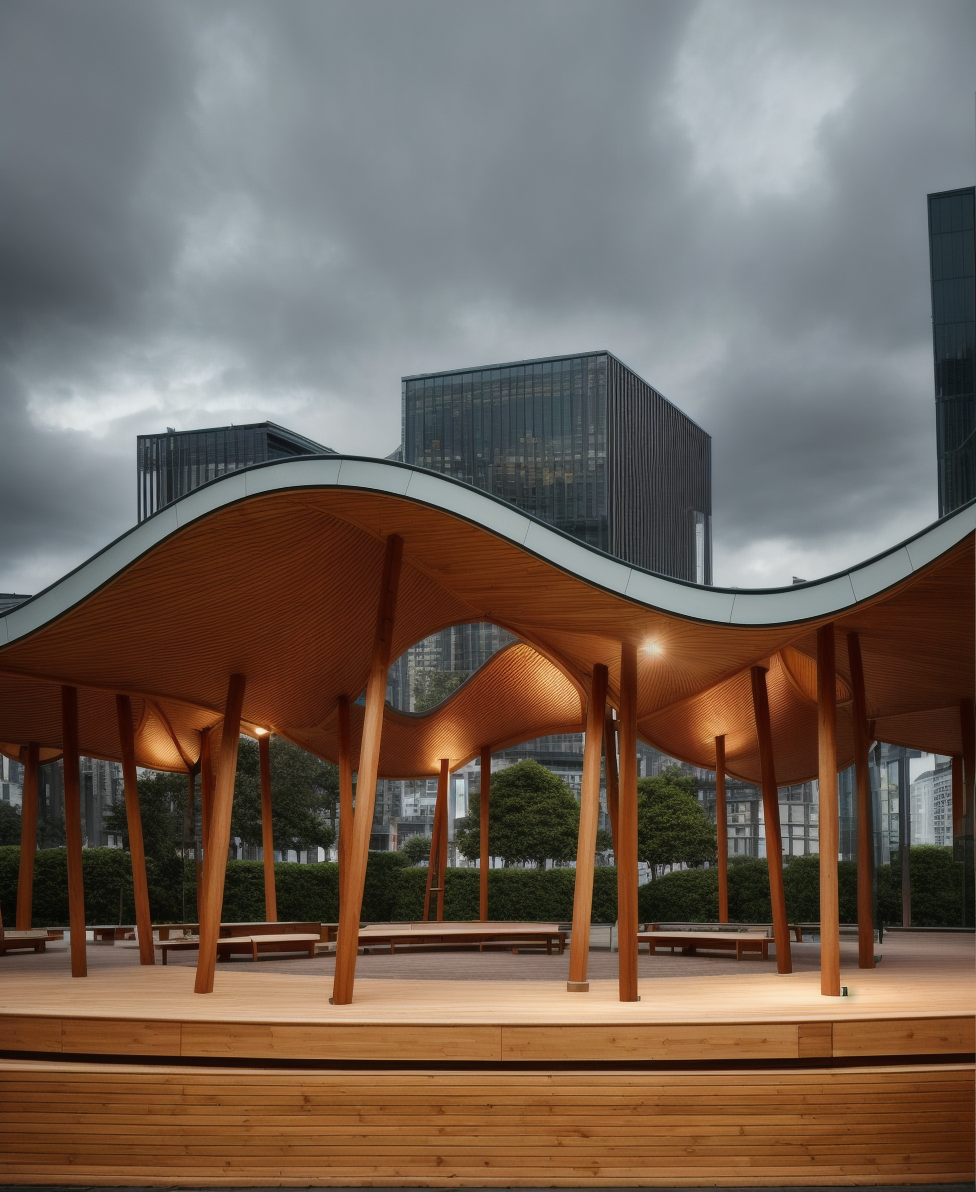
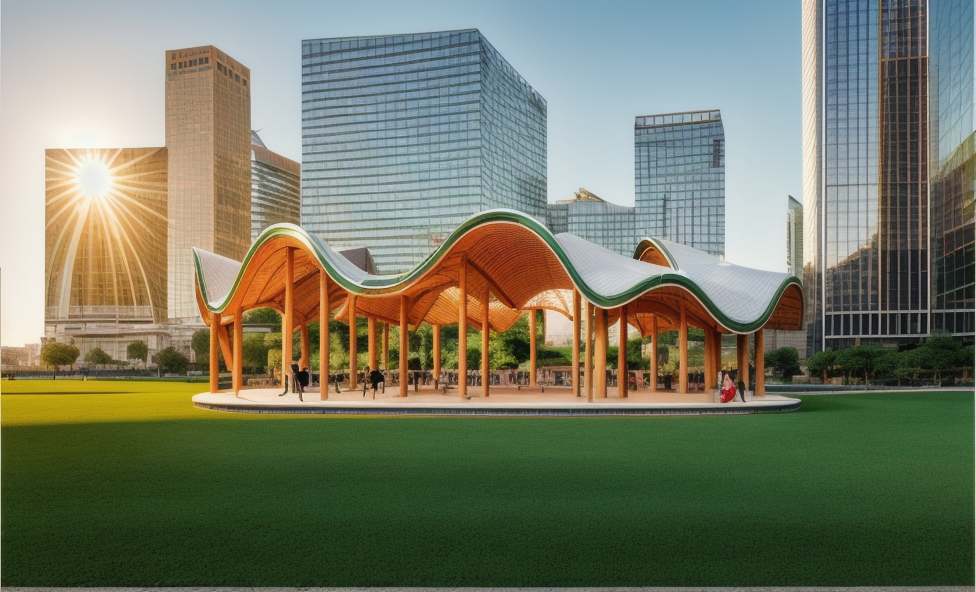
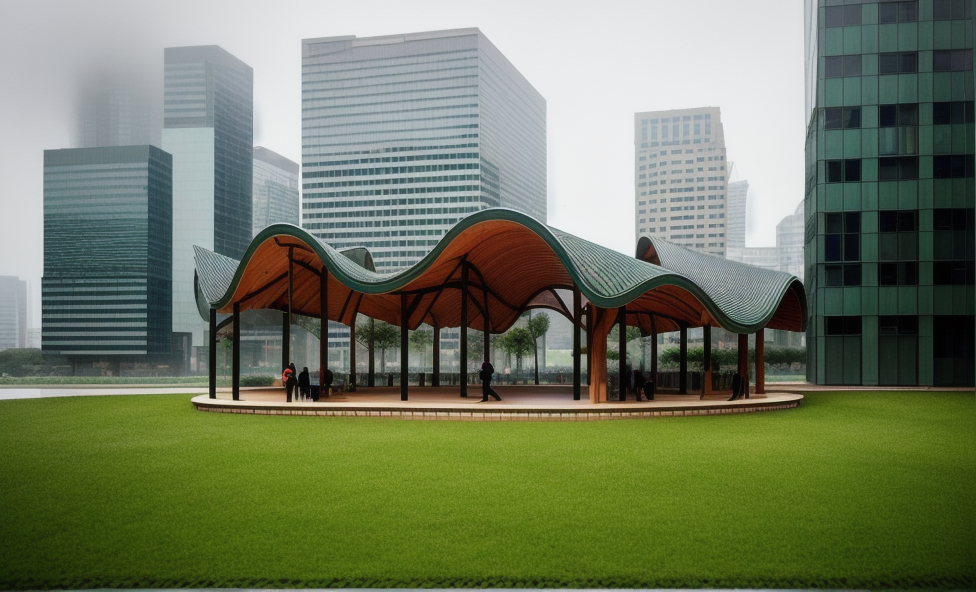
After that I generated a couple of different renders while I adjusted the settings slightly, then I wanted to edit the model and add these inclined columns to my design.
And this time let’s create a portrait render. Once you find a nice view again save it and just hit generate. Here it is. Let’s check all the renders we created.
So what do you think about this use case of AI as a Render Engine? I think it is such a powerful tool. The only downside I can think of can be the amount of accuracy and control over the final image. But it is improving every day with new extensions and developments.
Do you think you will try to use it in your next project?
I am planning to do a comparison video between a classical real-time render engine and this. Is that something you would be interested in? Please let me know in the comments.
I hope you enjoyed this. See you in the next one.


 Just occasional emails with great value!)