
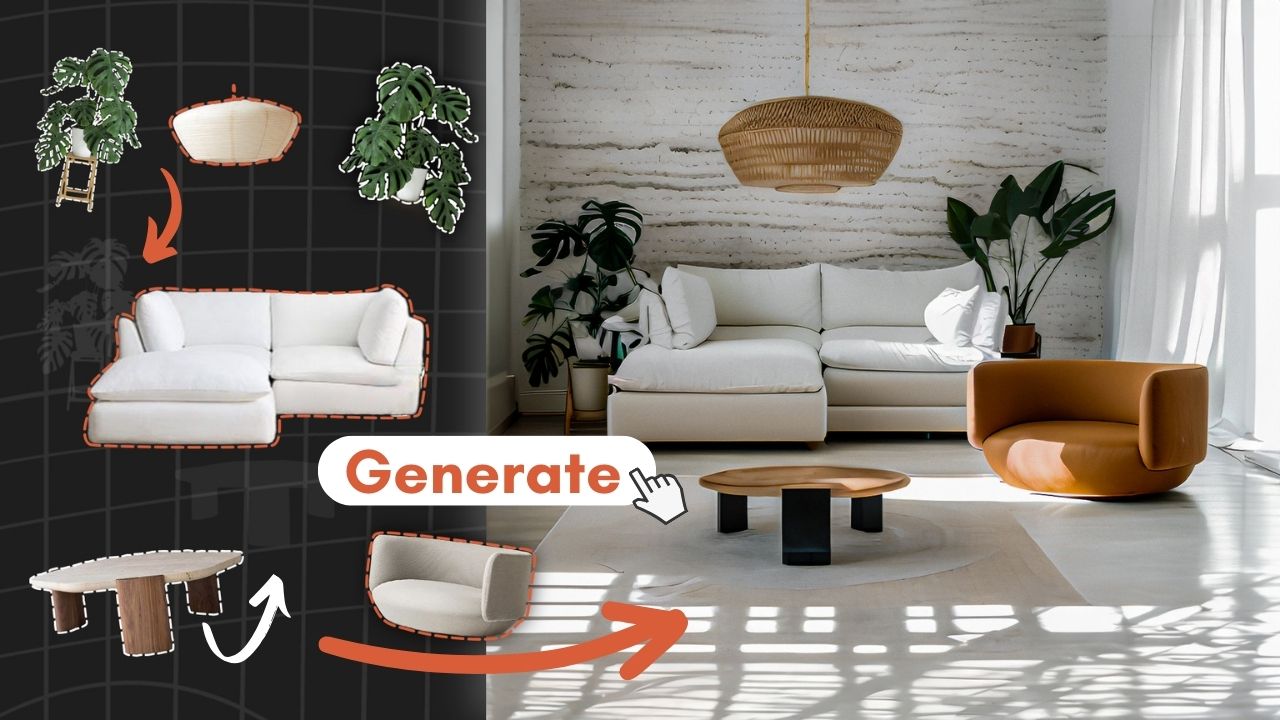
Okay, let me show you how you can turn these quick drawings into realistic renders like these using AI in just seconds.
Resources
- Realistic Vision V1.4 (Updated)
- Realistic Vision V2.0
- ControlNet Paper
- Install Stable Diffusion Locally (Quick Setup Guide)
- Stable Diffusion AUTOMATIC1111
For this, I will use Stable Diffusion AI. Stable Diffusion is an open-source, deep-learning text-to-image model. If you have heard of Midjourney or Dall-E, it is similar to them.
In addition to that, we need the ControlNet extension. This allows you to have more control over the process.
I have put the link for the ControlNet research paper below. If you are interested and want to learn more, you can check it out.
Then go ahead and start stable diffusion. If you don’t have it installed, I placed a great tutorial link in the video description. You can check from there. It will take some time to start, depending on your device.
Once you have this URL, just copy and paste it into your web browser. And here is the Stable Diffusion User interface. You can choose which model to use. For this tutorial, I will use the Realistic Vision 1.4 model. I tried many different models and got the best results using this model.
Again, you can find all the tools and websites you need in the video description.
You have text-to-image and image-to-image options here at the top. You can choose which one you want to use here.
I am going to use the text-to-image version with ControlNet enabled.
There are hundreds of settings so that you can feel overwhelmed, but you don’t need to change much to get good results. Most of the settings you can leave as default.
Go ahead and upload the drawing that you want to use as a reference to this section inside ControlNet, adjust the image size, and start typing the text description. In your prompt, try to use as many keywords as possible to describe how you imagine this space. Try to specify lighting type, materials, etc.
Don’t forget to click the enable button for ControlNet; otherwise, it will only use your text as input, not your sketch.
You also need to choose one of the models for ControlNet.
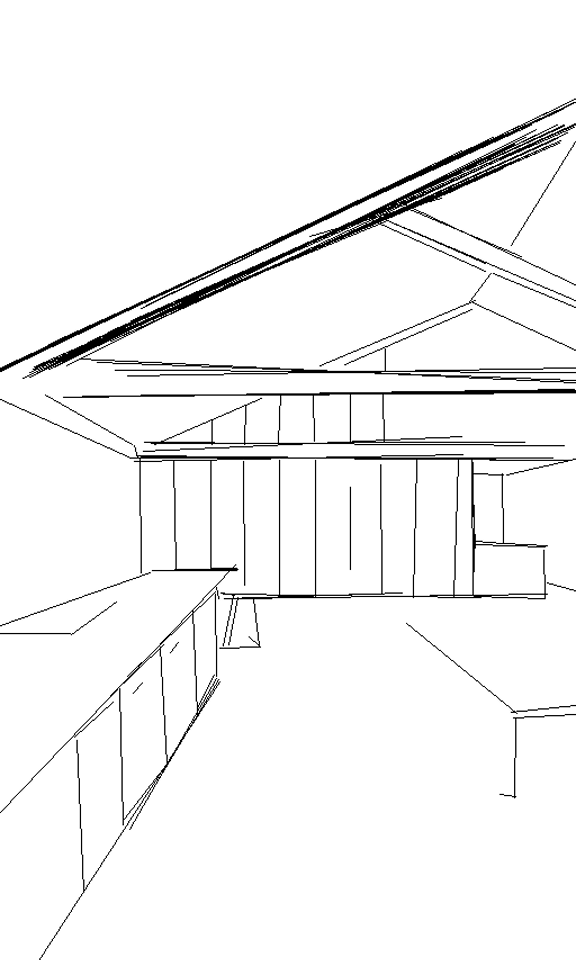
There are several different ones you can pick. They all create different base images, here are some of them for our drawing.
Here are all of them compared with the same image input. You can find more detailed information about them in the ControlNet paper.
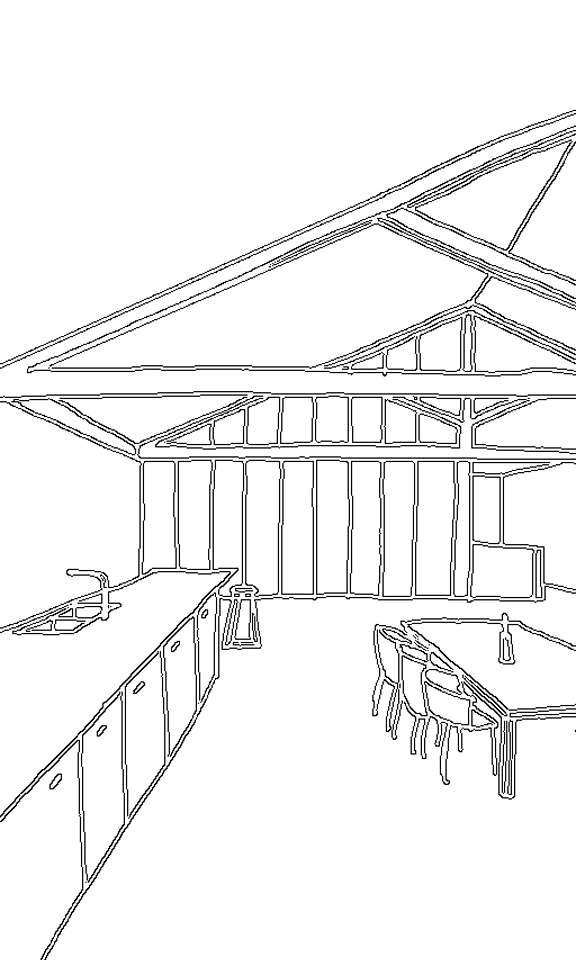

I will use the scribble model for this version. I think this one gives the best results for drawings like this.
Make sure everything looks okay, and press Generate. For the first generation, it will take some extra time to load all the necessary models, and the next ones will be faster.
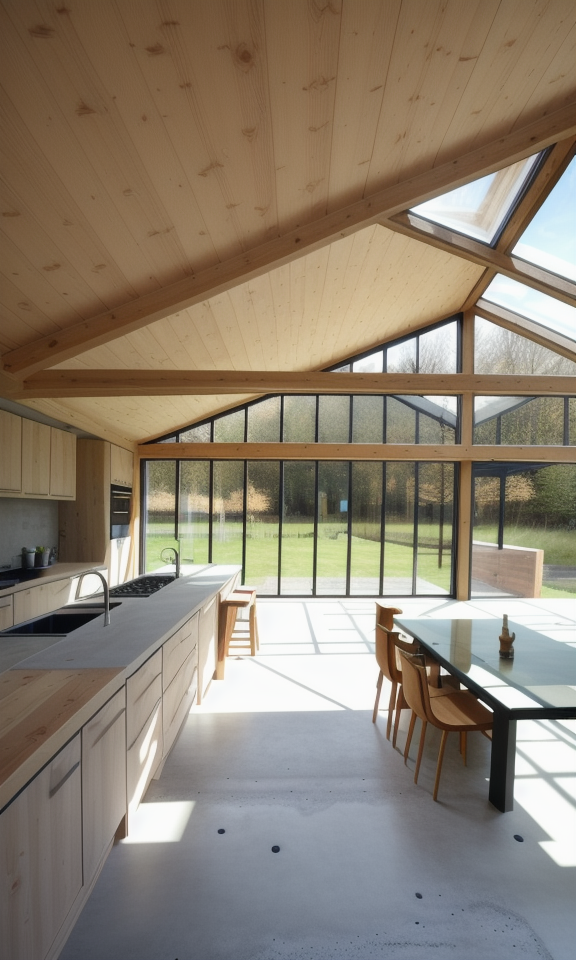
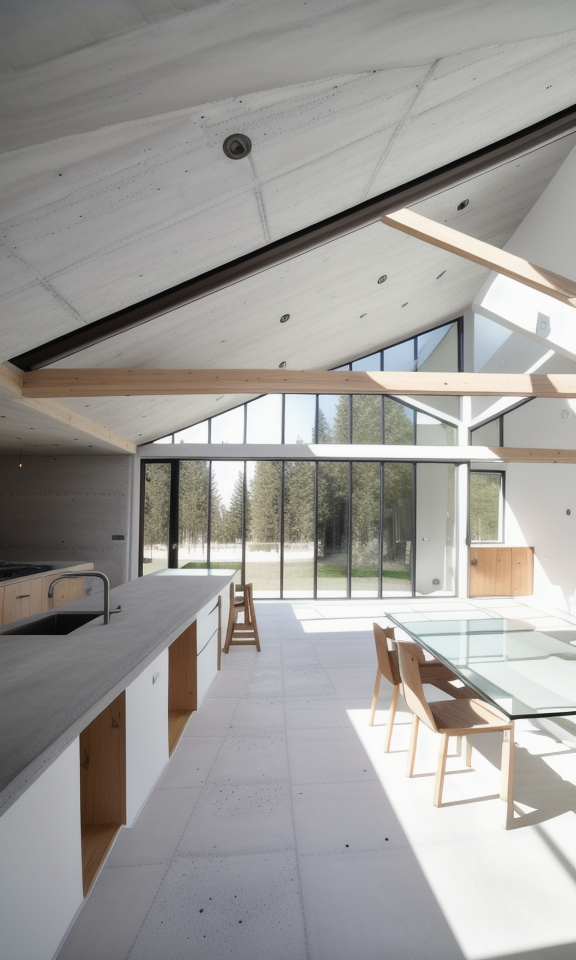
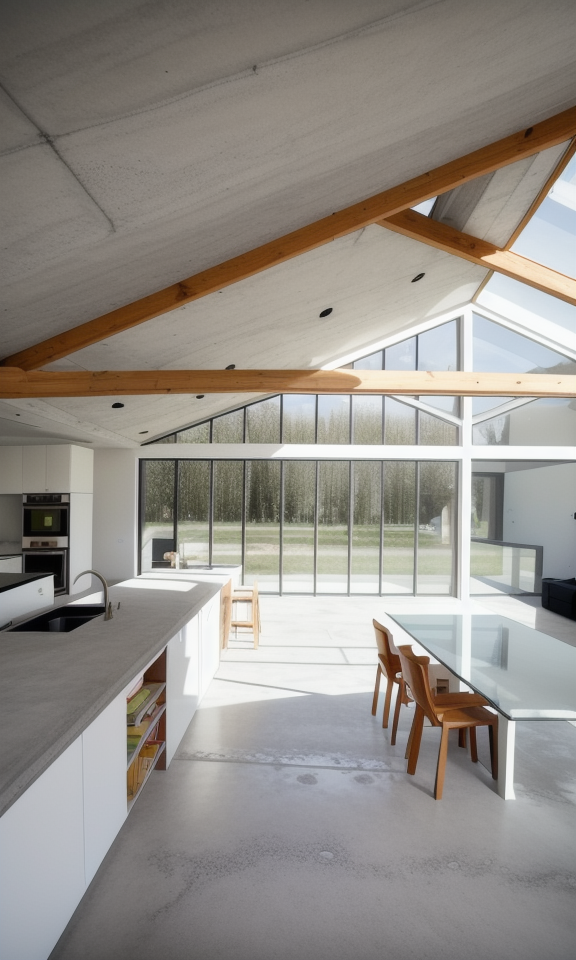
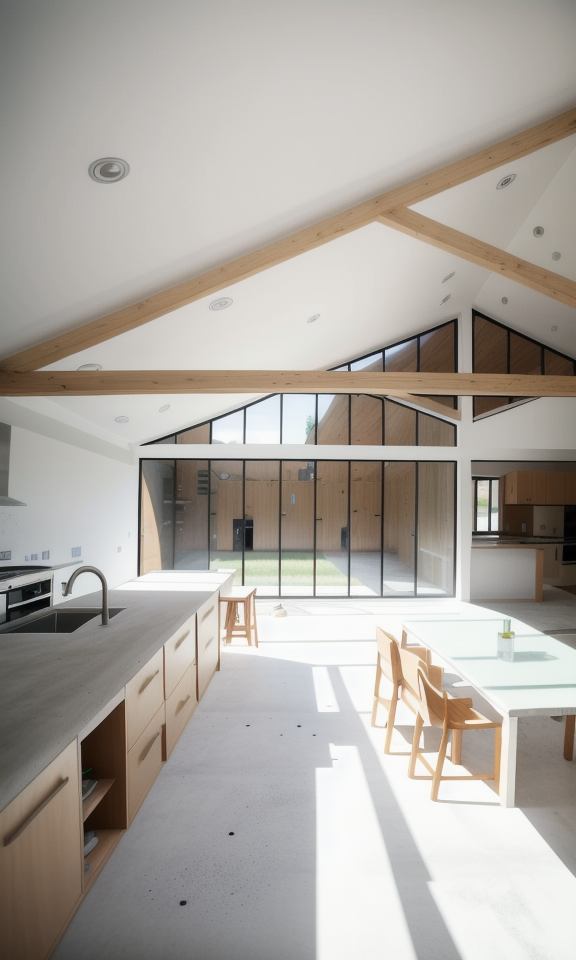
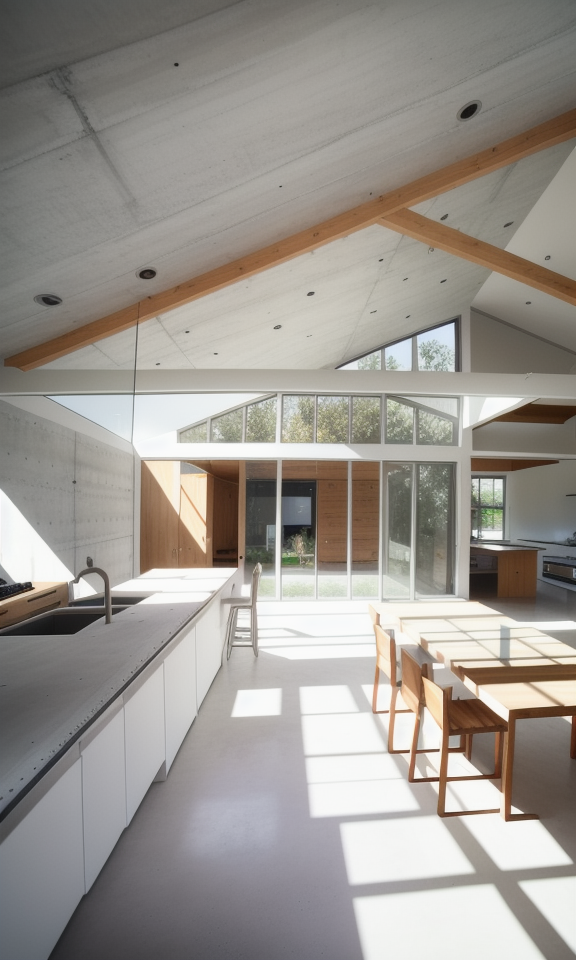
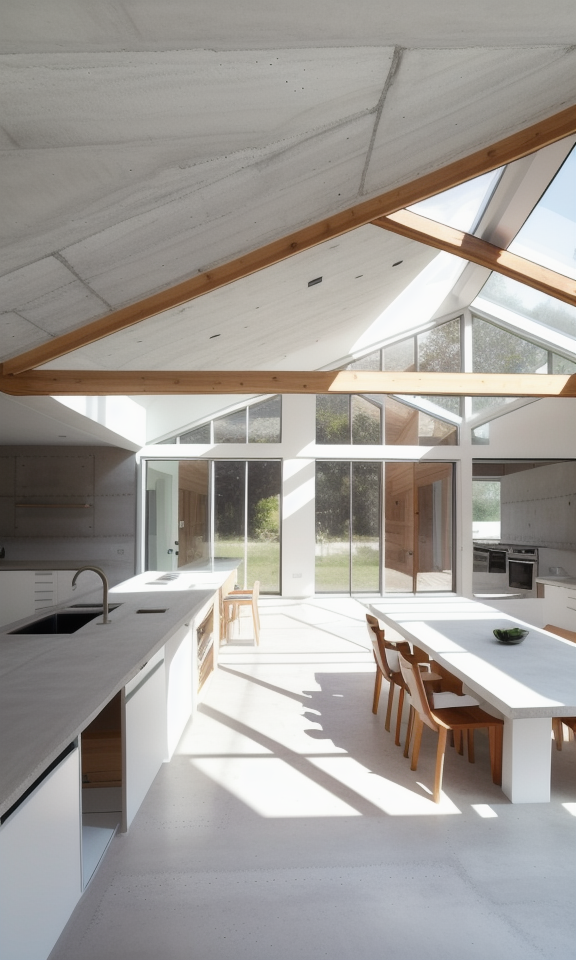
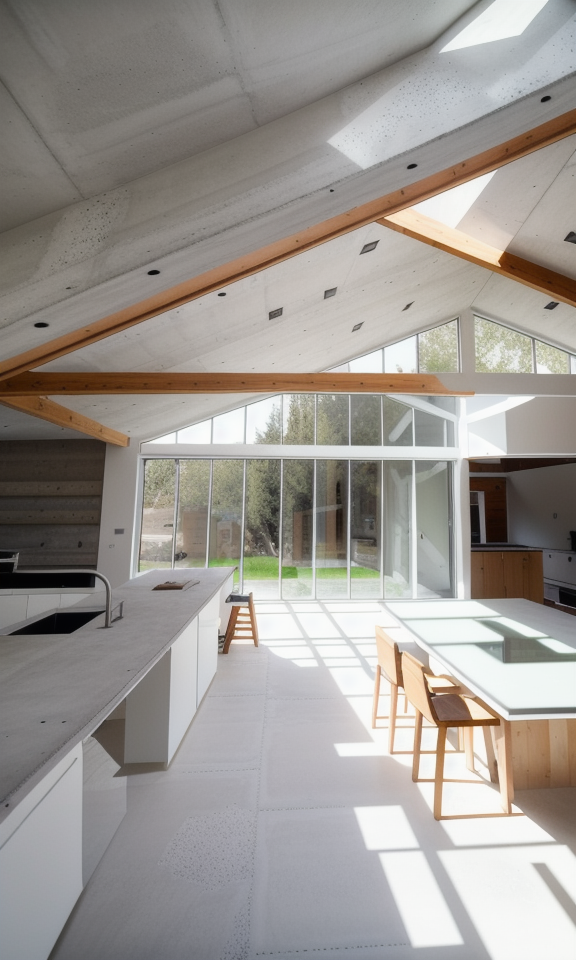
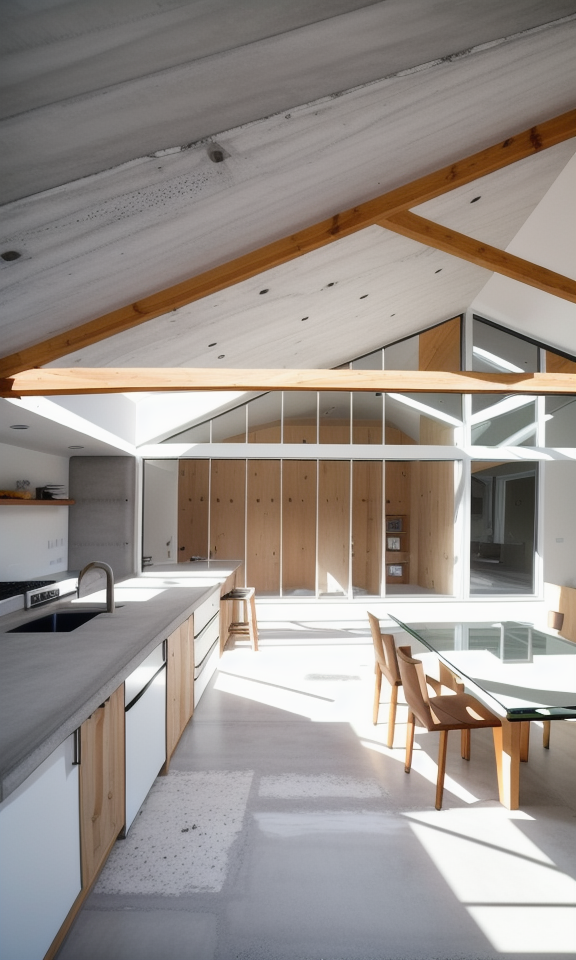
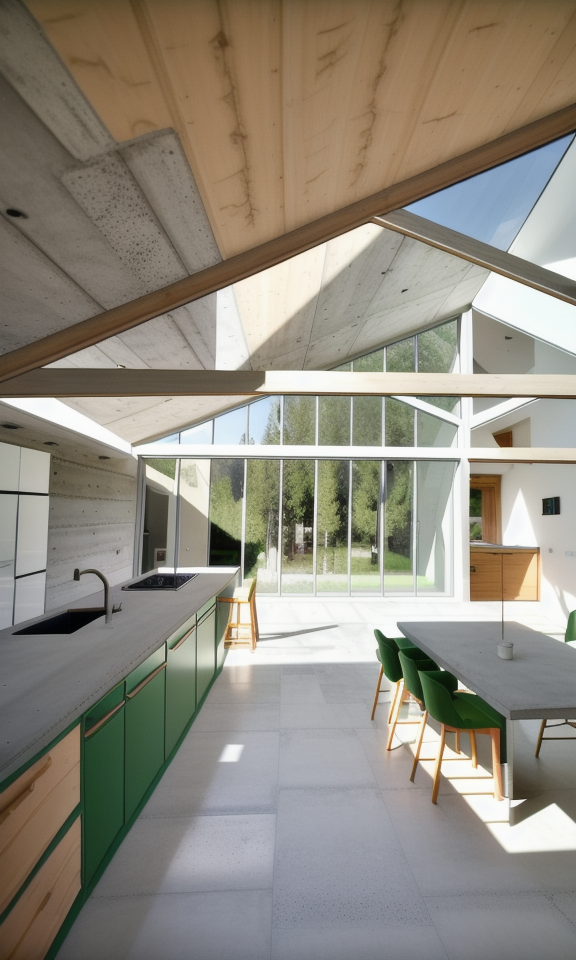
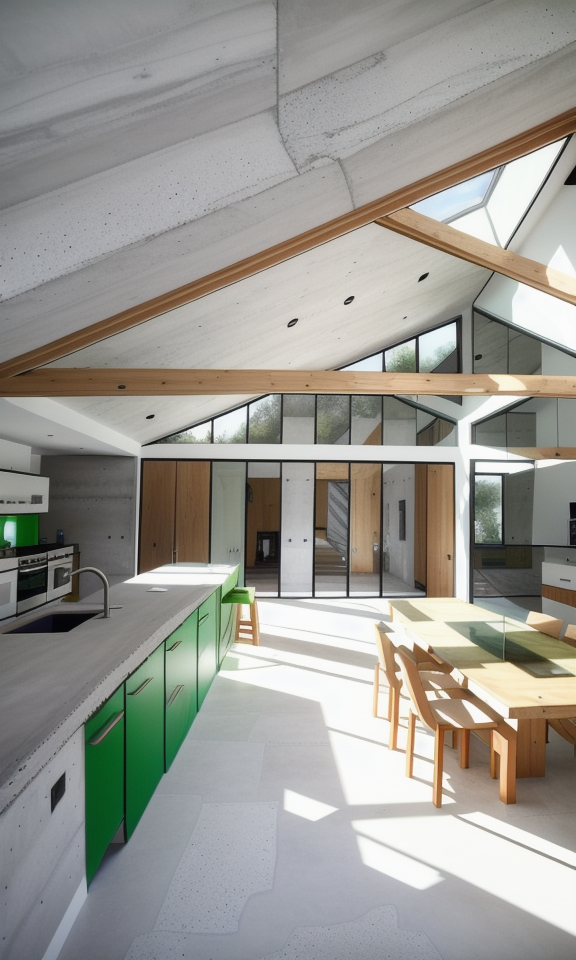
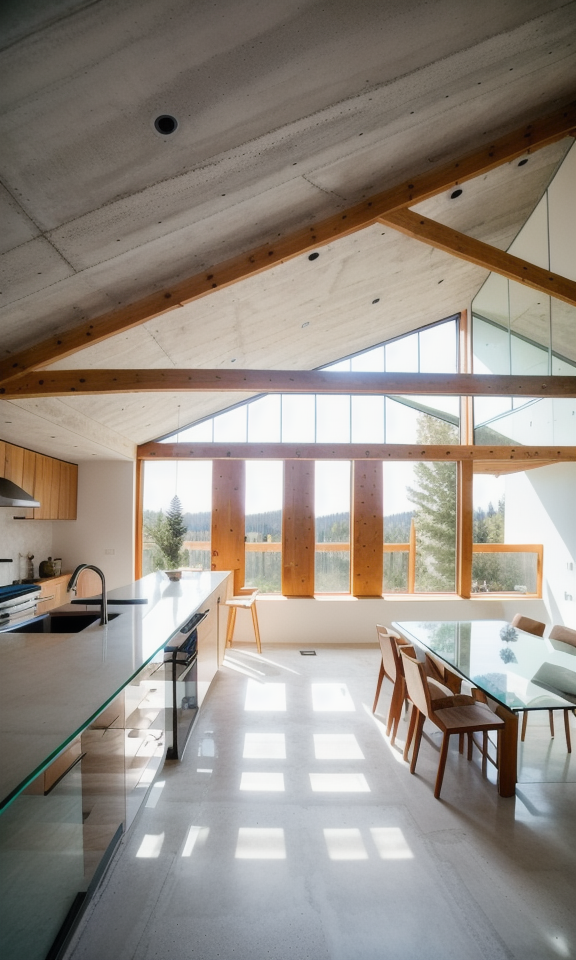
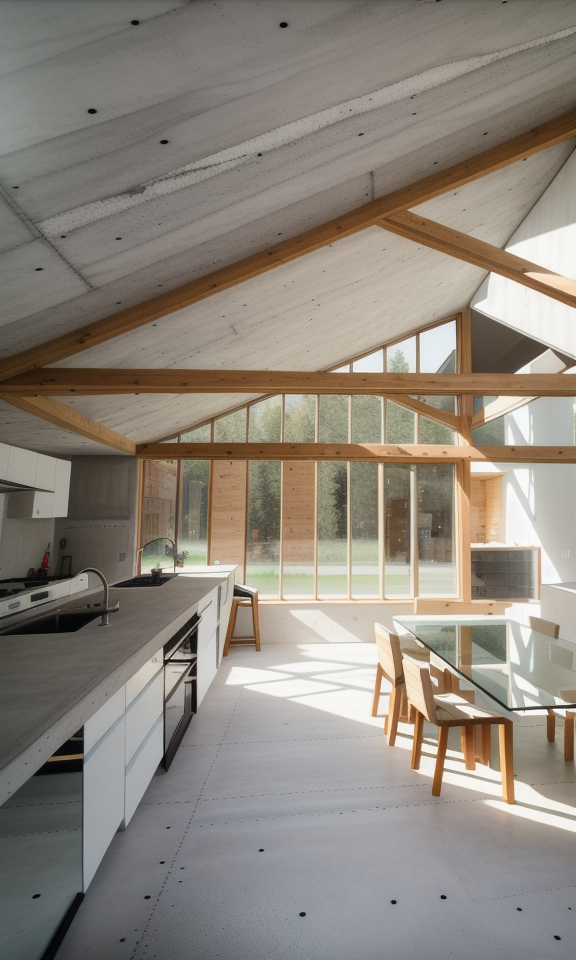
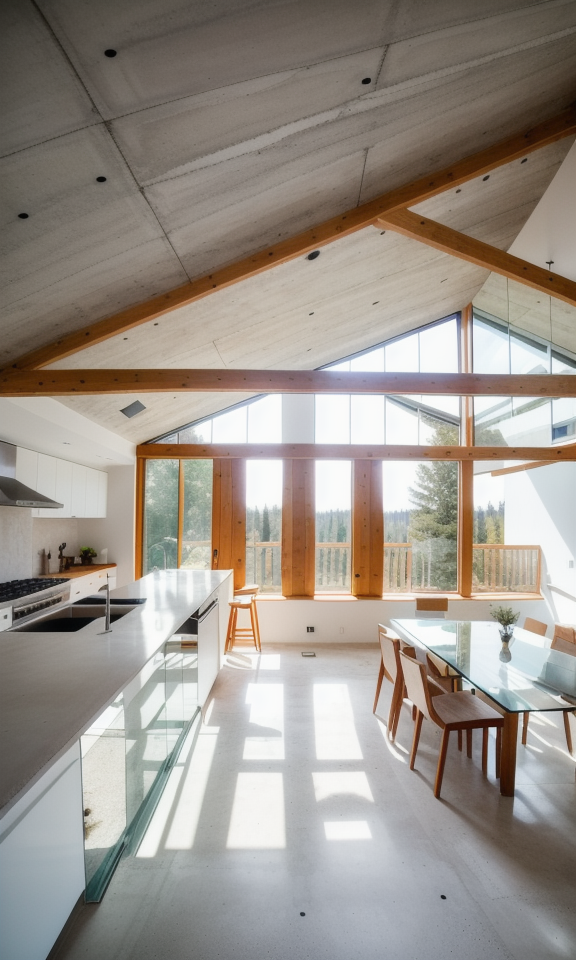
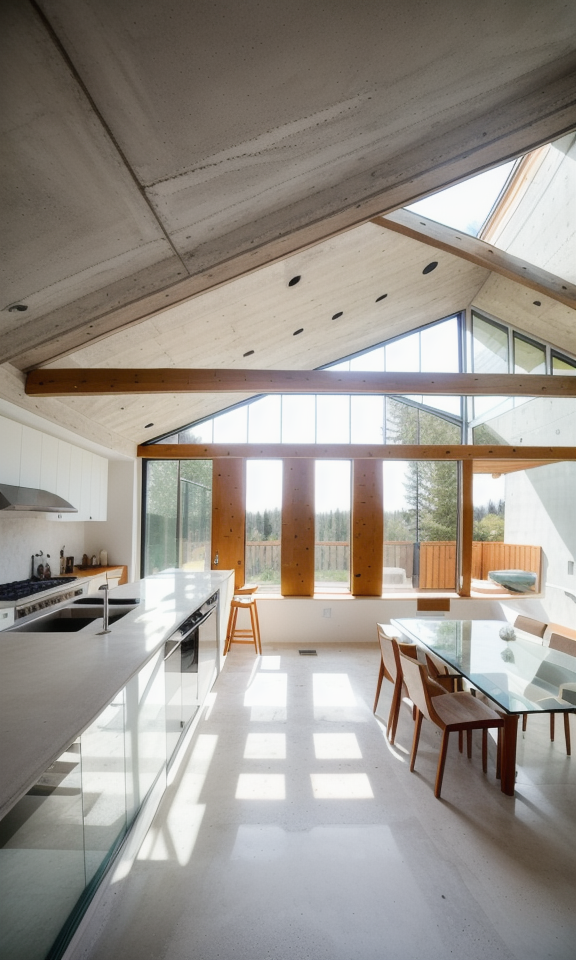
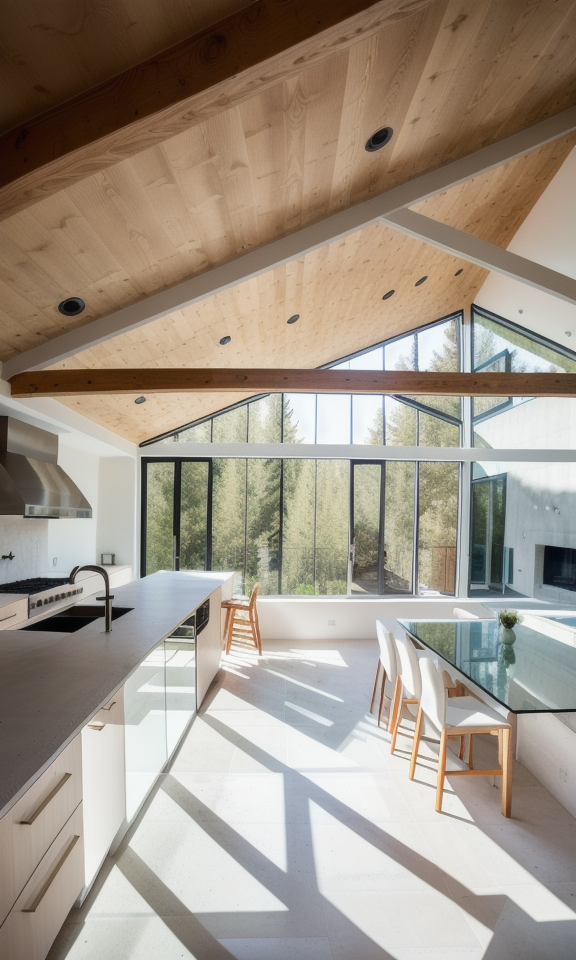
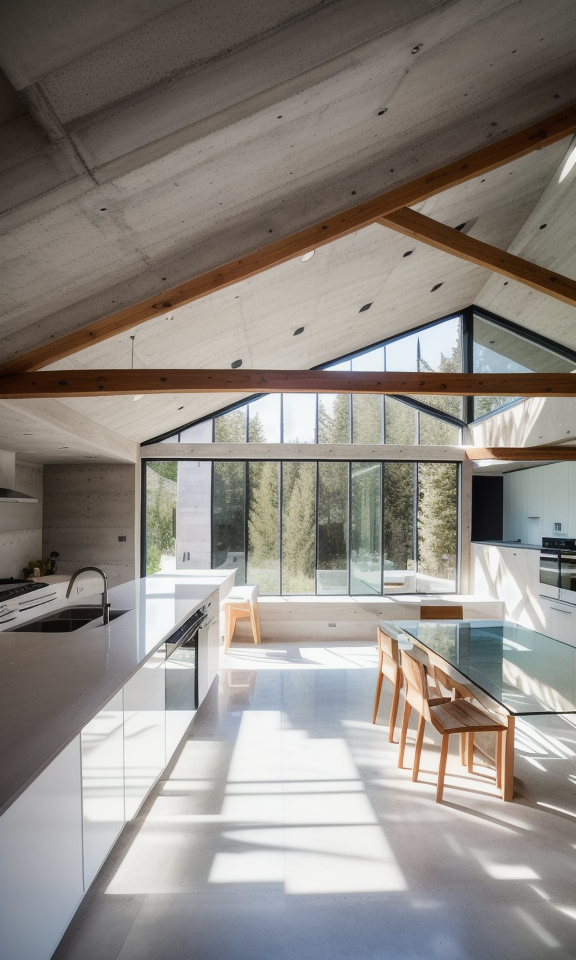
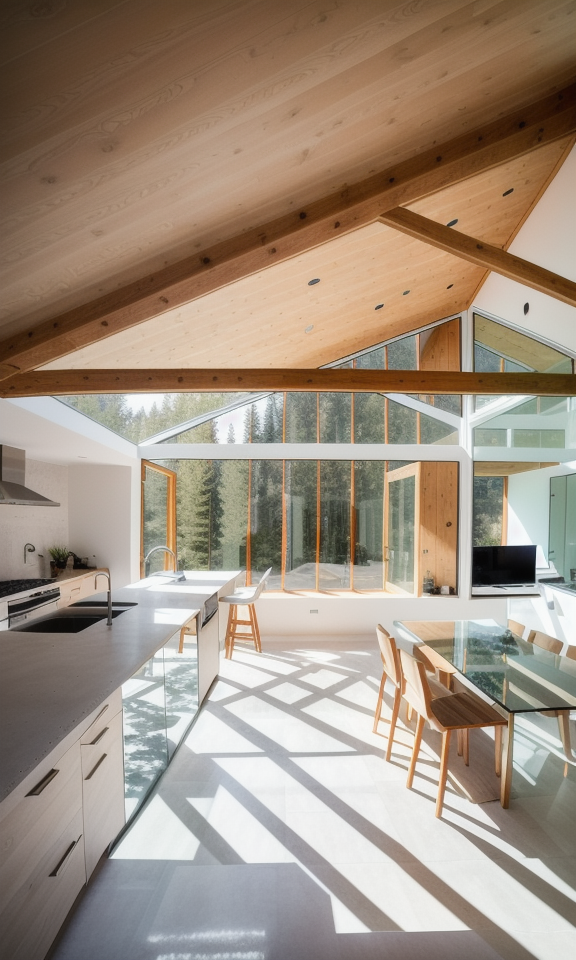
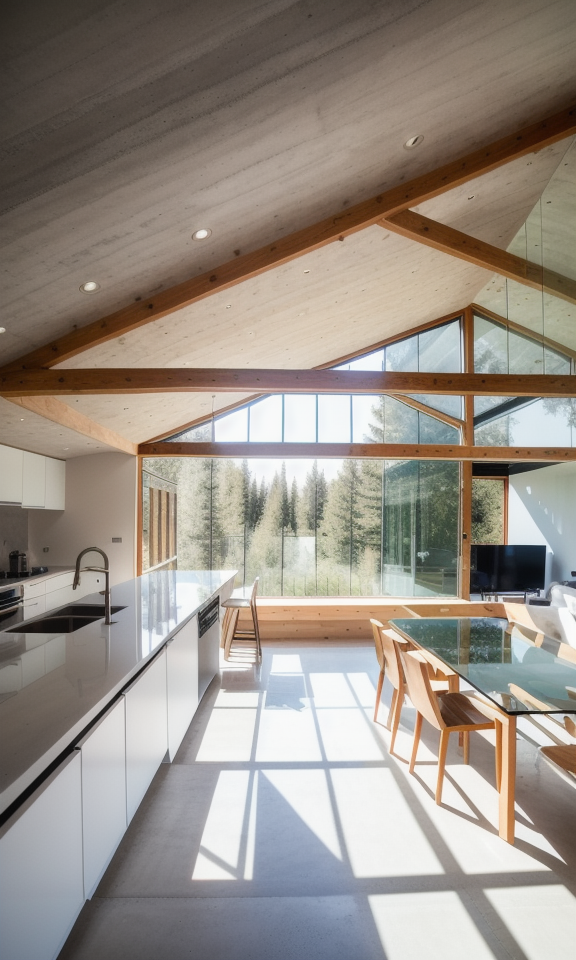
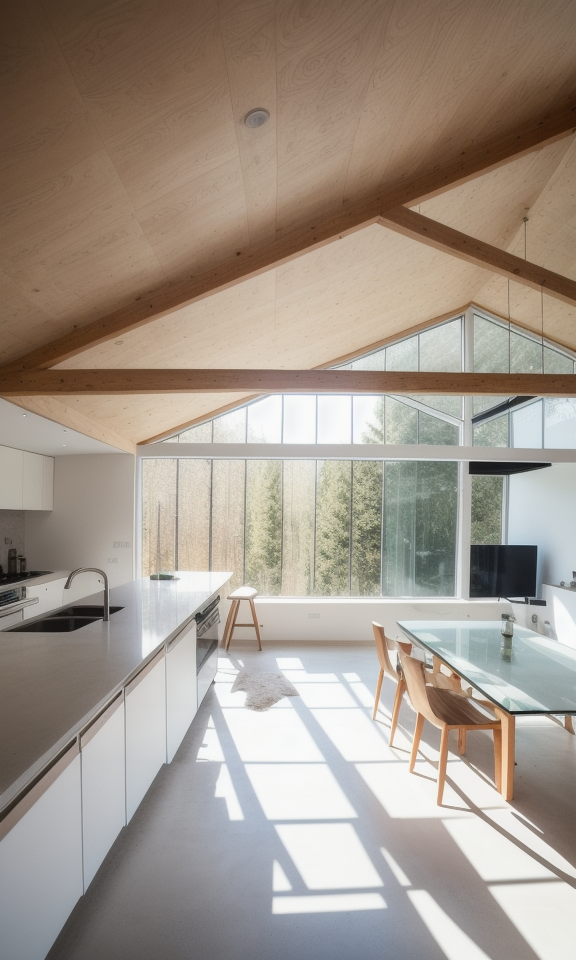
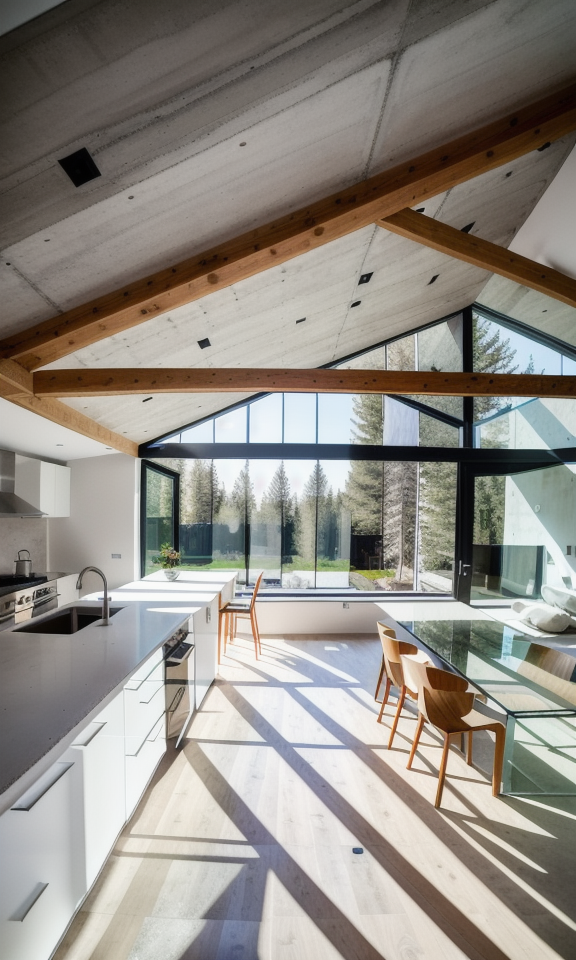
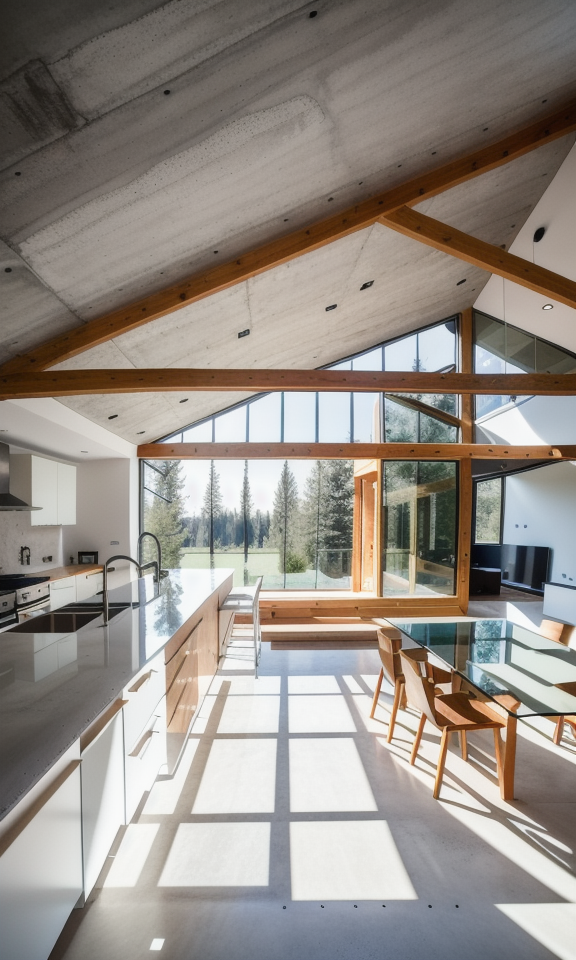
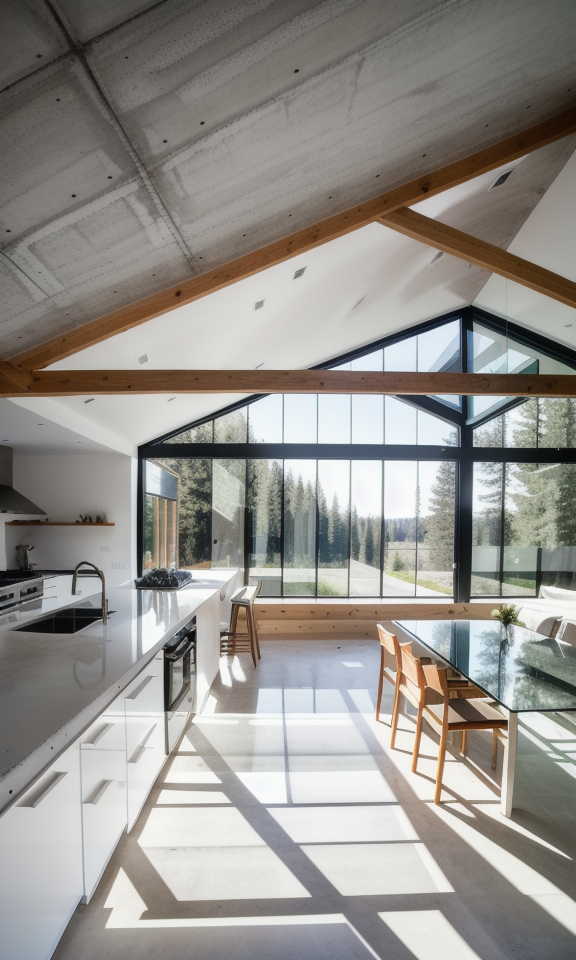
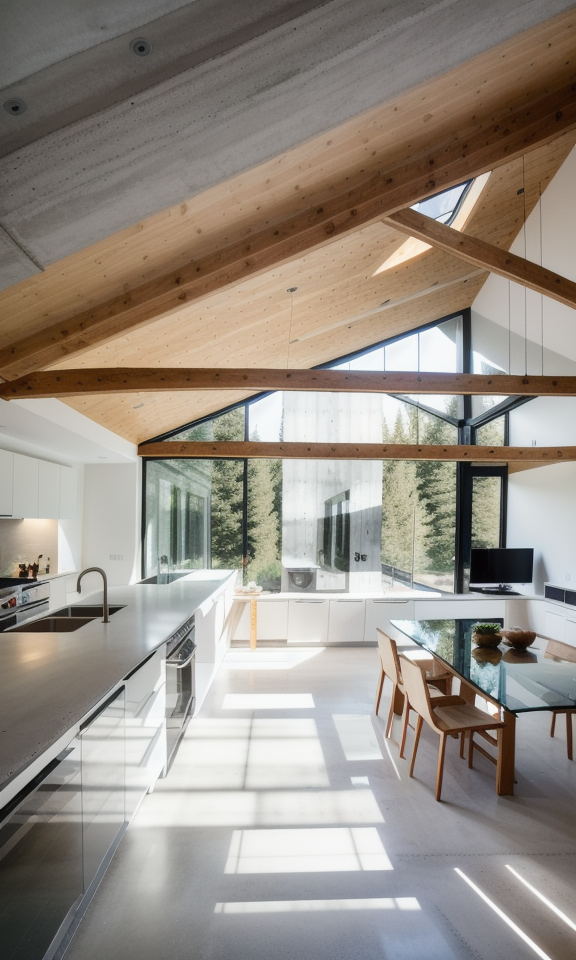
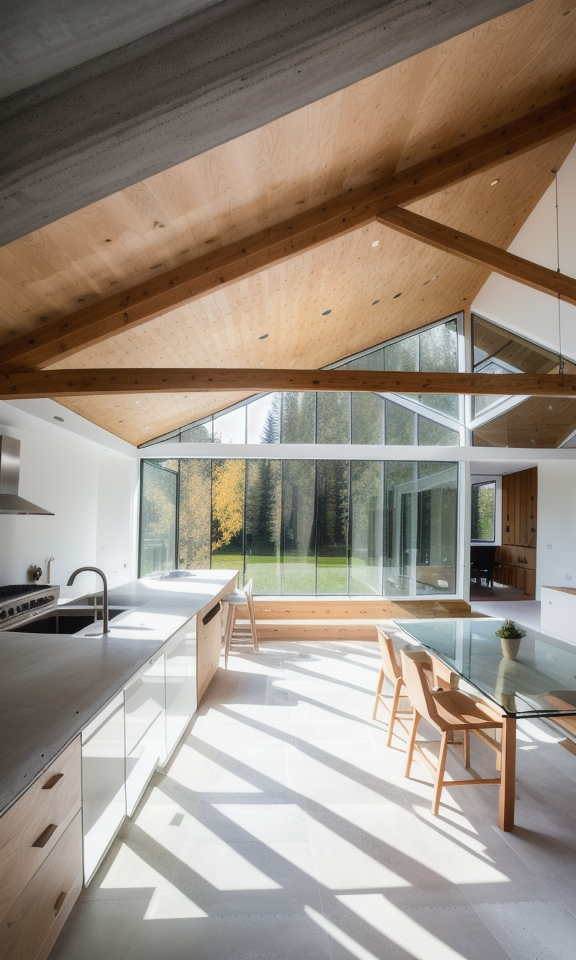
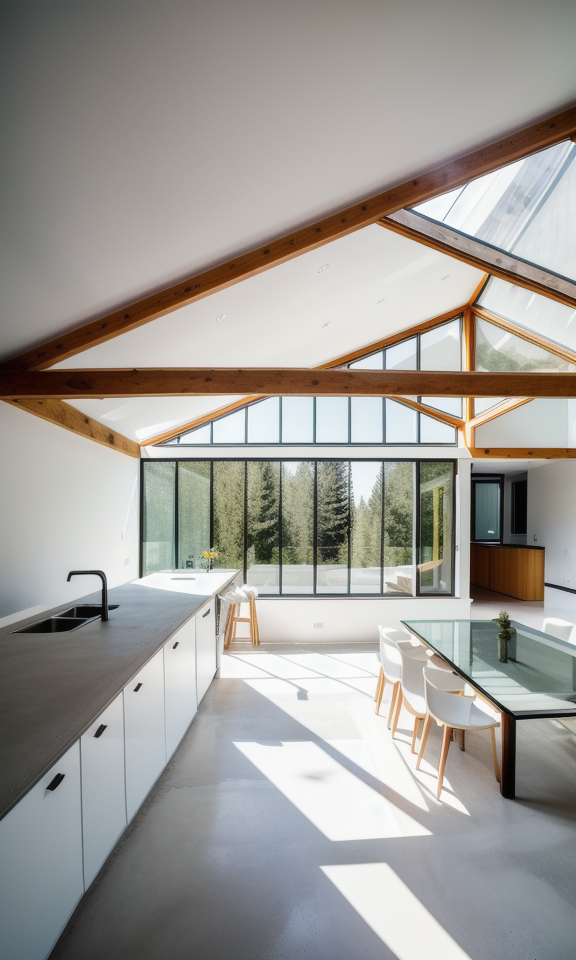
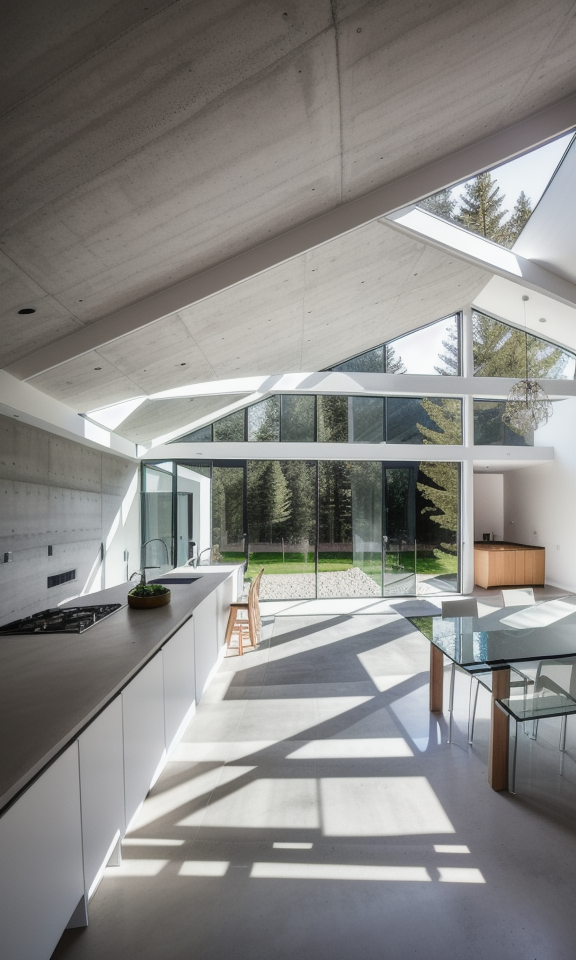
As you can see here, I have created different versions by adjusting my prompt slightly.
You can find the images in the outputs folder inside Stable Diffusion. Choose text-to-image and find the current date. Here are all the images we generated.
After that, I tried a couple of different versions by adjusting our prompt a little bit, and here are some of the results.
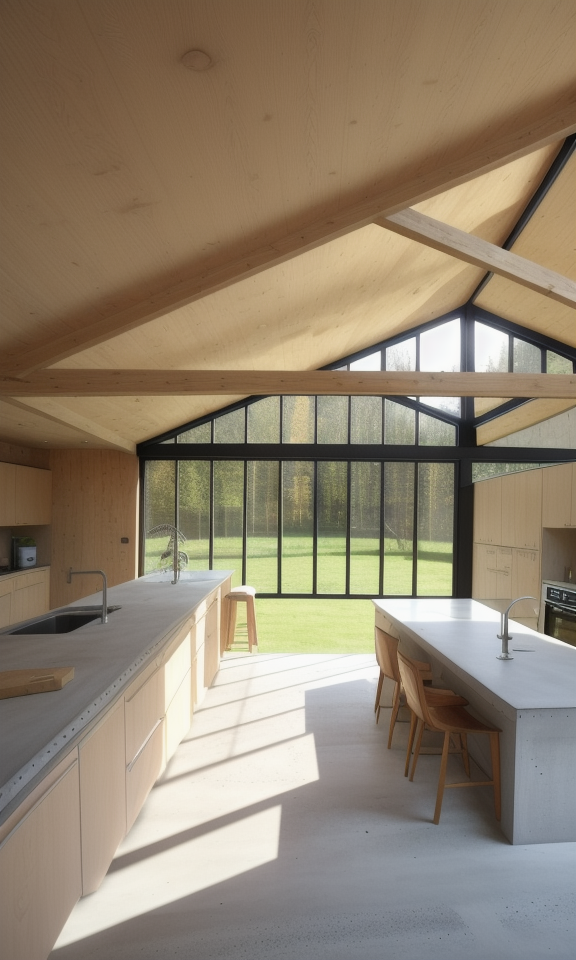

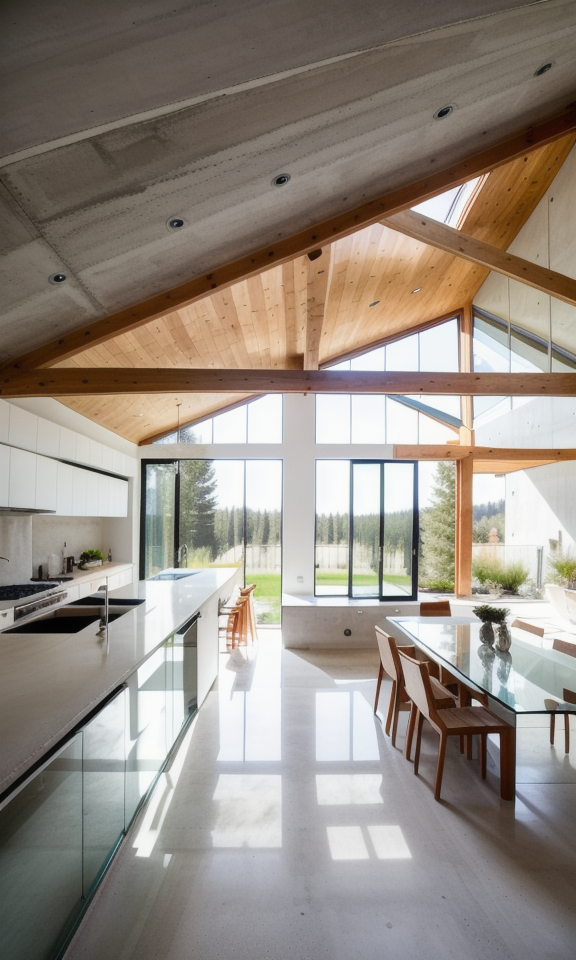


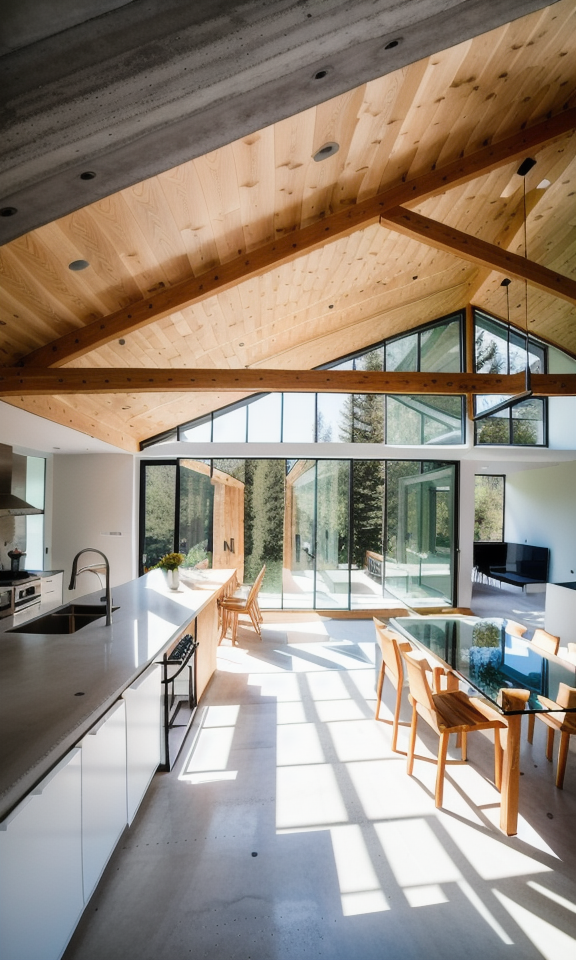
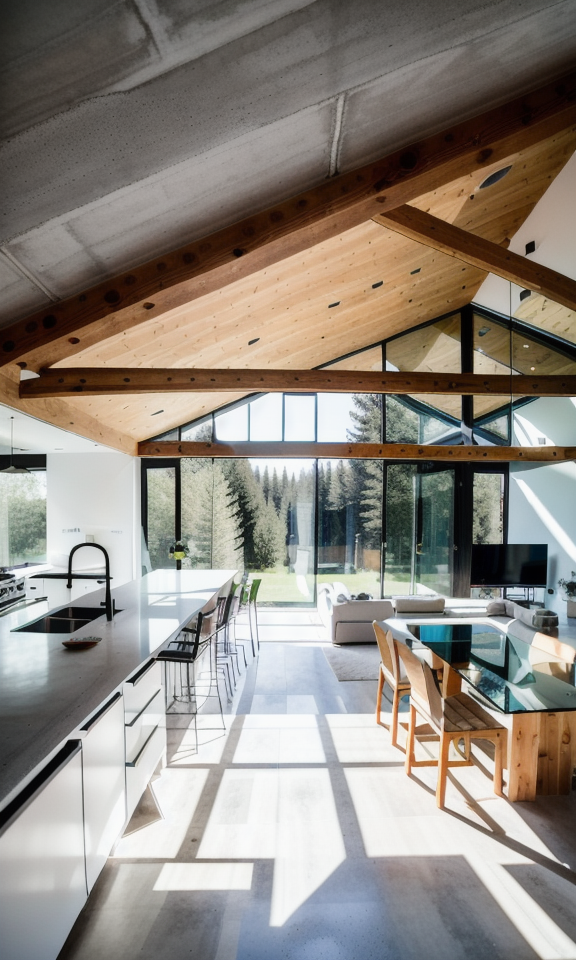
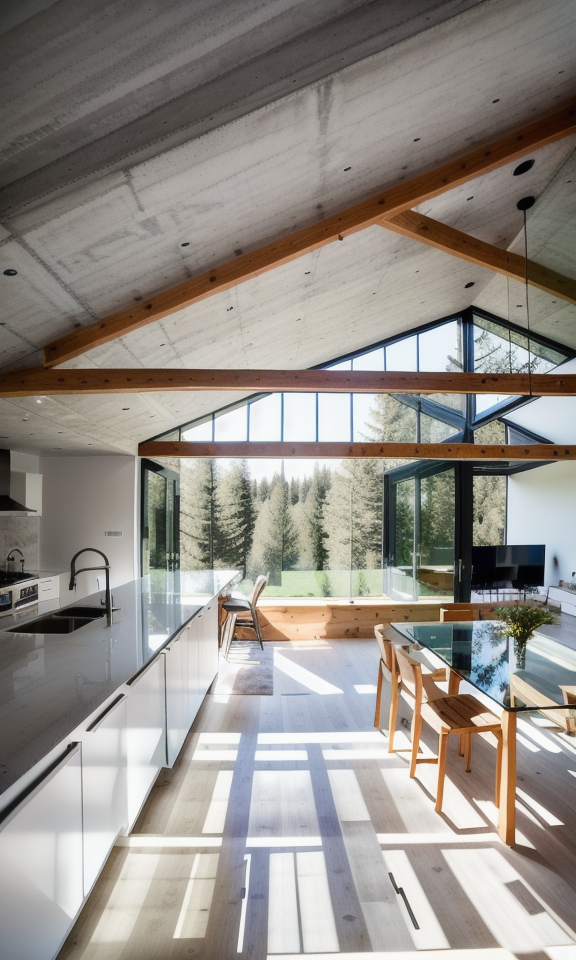
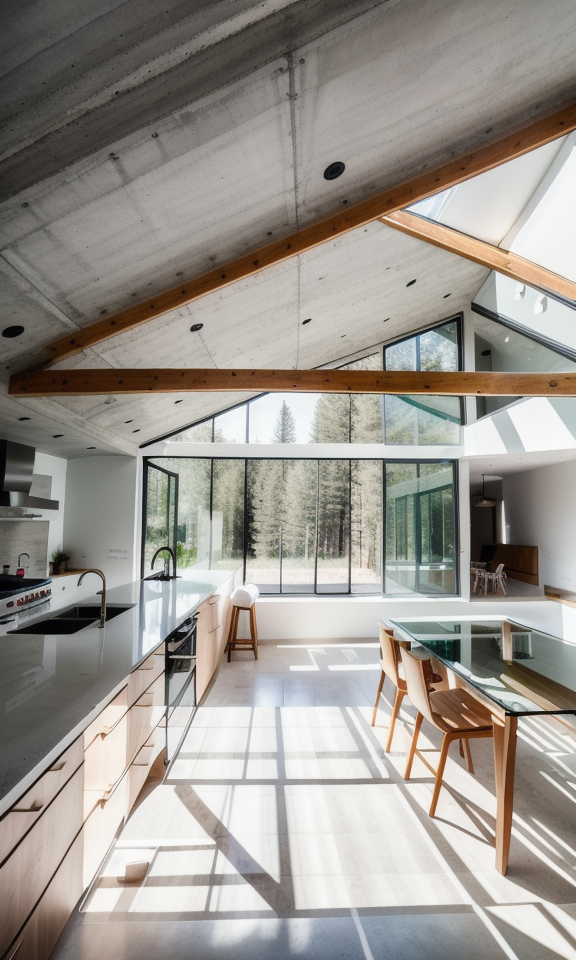

I don’t know what you think, but I think that this is like magic. It is so amazing what you can create just from your quick conceptual sketches and be able to show your ideas to others.
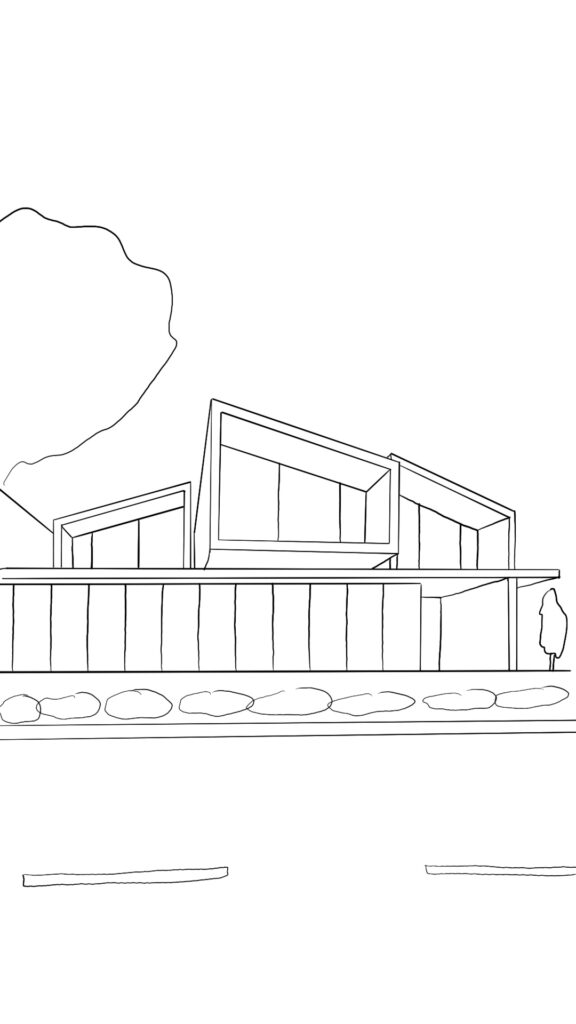
I have another sketch for an exterior view this time. I will upload that and try to create a render for an exterior view. I did not change the settings much, just added my new prompt for the image.
And here are the final results.
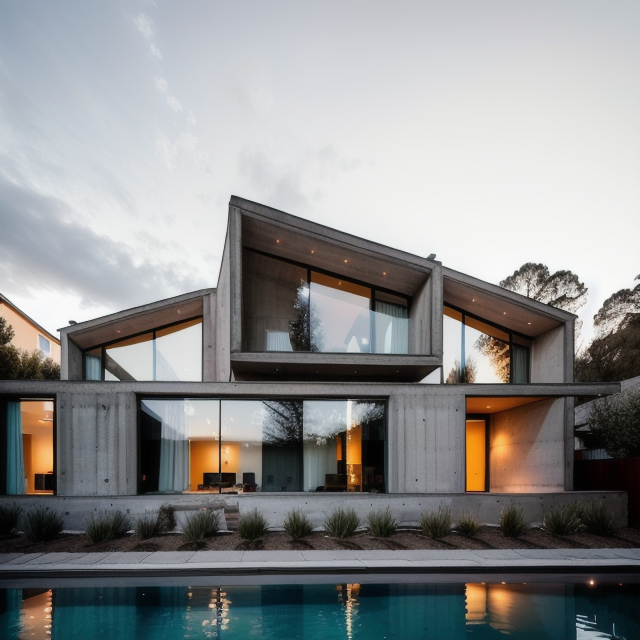
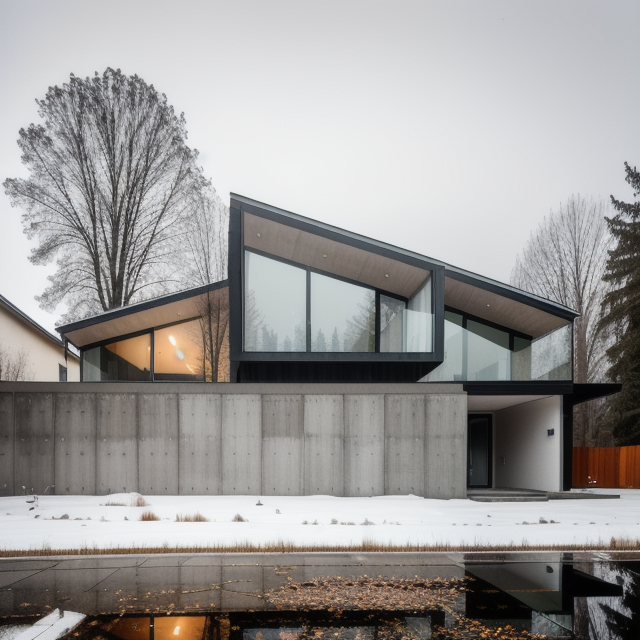
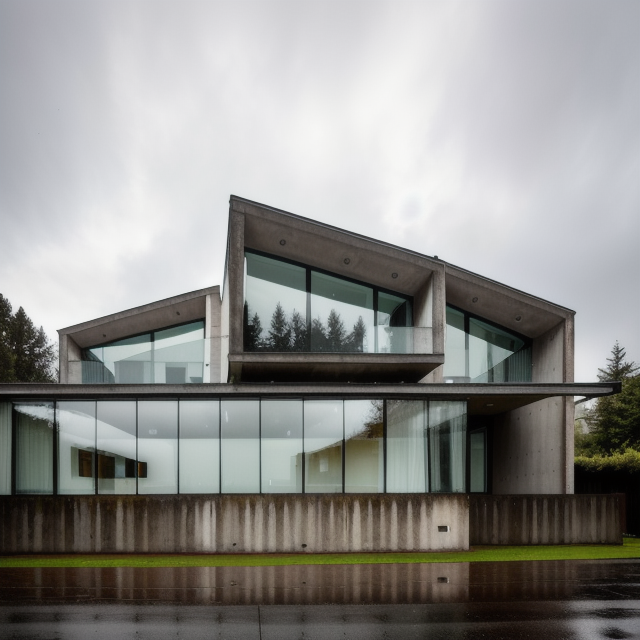
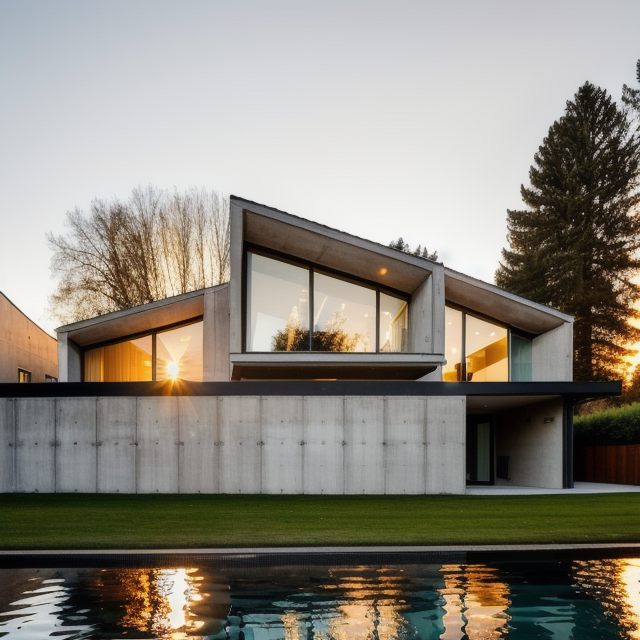
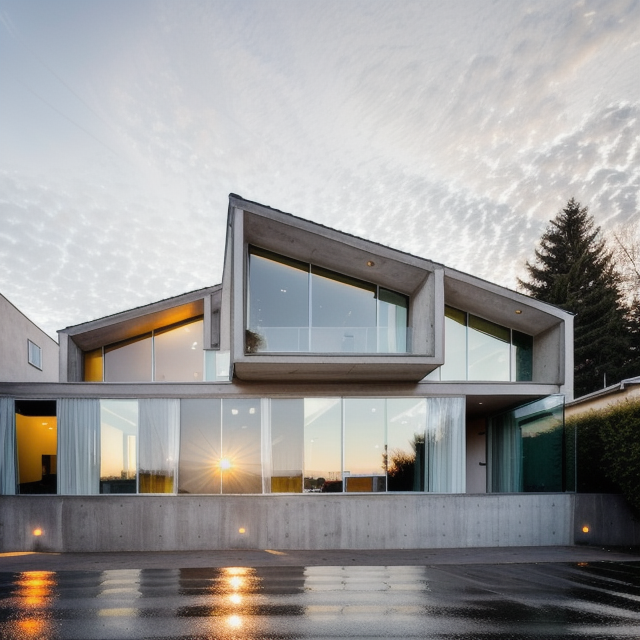
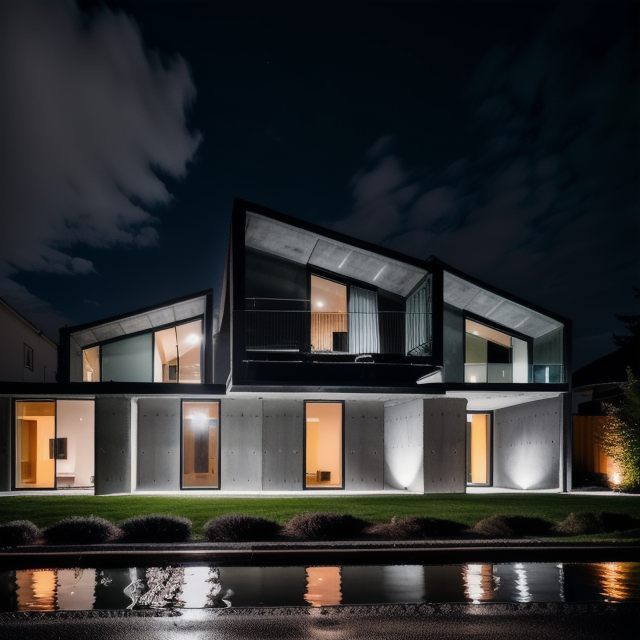
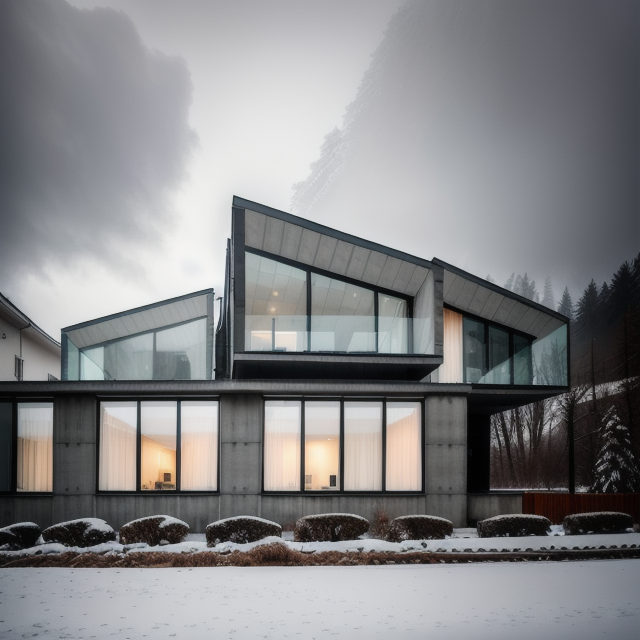
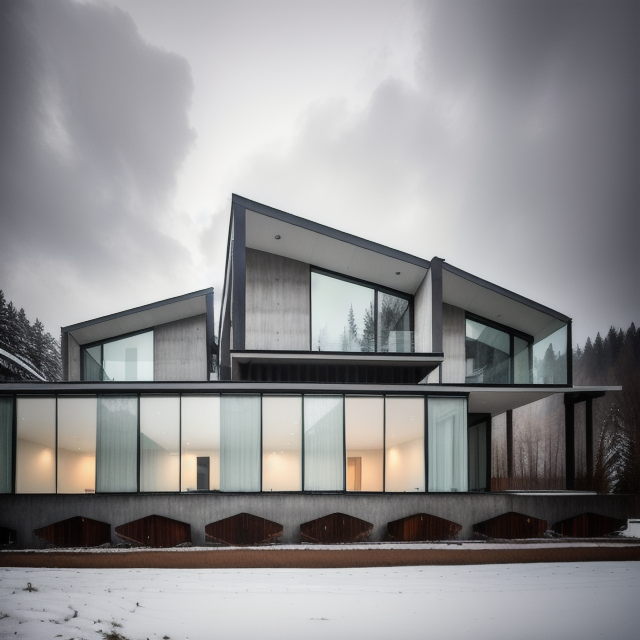
I tried to add different keywords to change the lighting and the overall environment for some of them.
I know that it is not good to rely on these new AI tools to do specific tasks for us, but why not use them to make our lives easier?
In the early days of a project, it can be used to speed up the workflow in the conceptual phase, especially when you have to present your ideas to others, but don’t have anything other than many quick conceptual sketches. You can use AI to help you improve the overall quality of your presentation. But at the same time, I think it is also possible to somehow “inspire” from some of the results. From different forms, materials, etc.
This was more of an overall video to show what is possible to do. So if you want a more detailed step-by-step tutorial, let me know in the comments.
I hope you enjoyed this. Let me know what you think of these new tools. See you in the next post.


 Just occasional emails with great value!)